
Dyeing cotton yarn – not so hard, after all!
Cotton Hand-Dyes, how-to’s for beautiful hues…
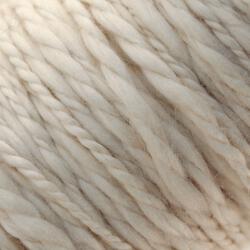
Those of you who are new to dyeing might not know this, but there’s a big difference between dyeing protein fibers (like wool and silk) and cellulose fibers (like cotton and linen). Don’t let that intimidate you! I did; after having spent the last few weeks figuring out how to dye wool and silk, I must admit to having been a little hesitant to try cotton. As it turns out, it’s almost easier. Using a skein of Inca Organic Cotton Yarn, I did some experiments. Here’s what I learned…
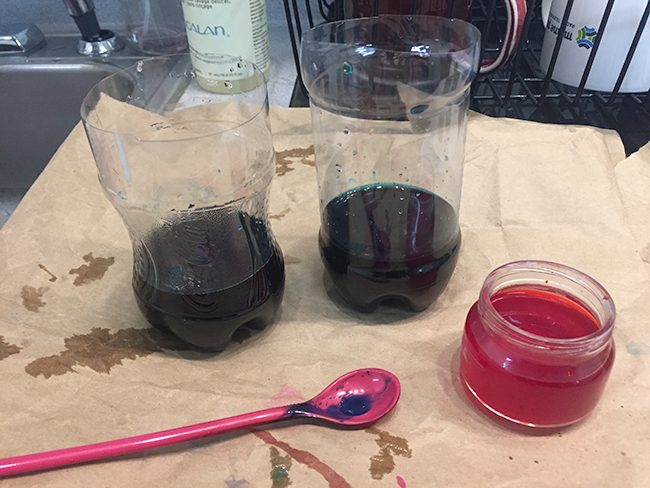
First mix some Soda Ash (I used about 1 Tablespoon) with water in a pot and stick your yarn in it to soak for about 30 minutes. While mine was soaking, I mixed up my dyes. It’s ideal to have a bunch of glass jars with lids so you can save your leftovers, but I made do for this experiment with cut off soda bottles and a baby food jar. To mix the dye, put water in each vessel and add dye powder until it looks good – which for me was probably around 1 teaspoon at most for that much water.
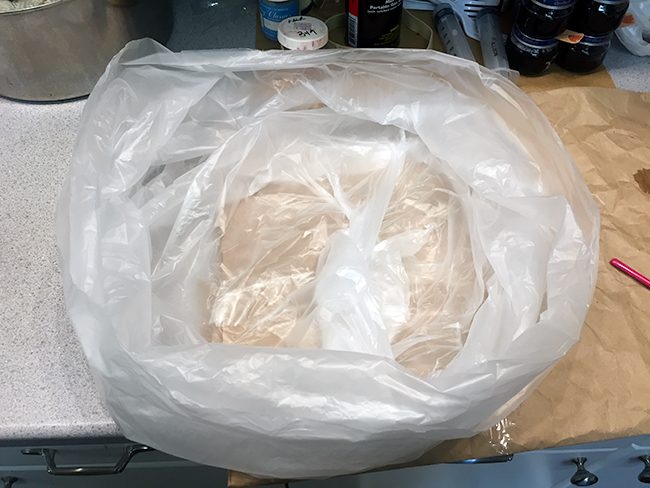
Next, lay out plastic wrap or some other kind of work surface. I set up a garbage bag, which will make more sense later. Since these can easily spring a leak, I put a layer of plastic wrap under the bag as well. This is where you’ll be applying the dye, so make the bag as open as possible without tearing or cutting it – it will need to be intact later.
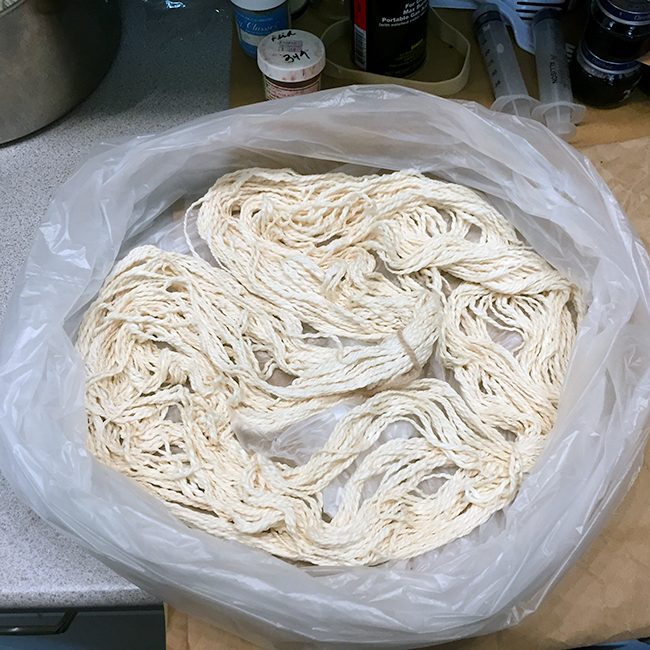
Once the yarn is finished soaking, put some gloves on and wring it out. Then spread it out as much as possible on your work space. You’ll want to expose as much yarn as you can before adding the dye.
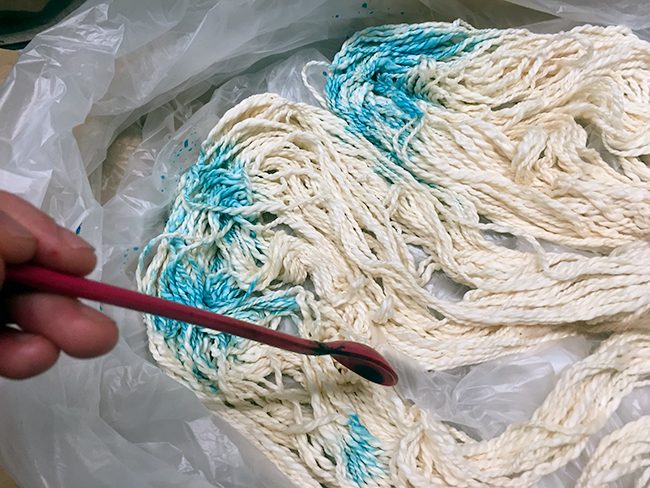
There are endless amounts of ways to apply the dye, but I enjoyed using a plastic spoon to pick up small bits and pour them in strategic places. Small spoonfuls were easier to control, and it’s always recommended to apply the dye a little bit at a time. In spots where I wanted more color saturation, I allowed the dye to pool under the yarn a bit. I also used the spoon to poke the yarn around, thus allowing the dye to catch more strands.
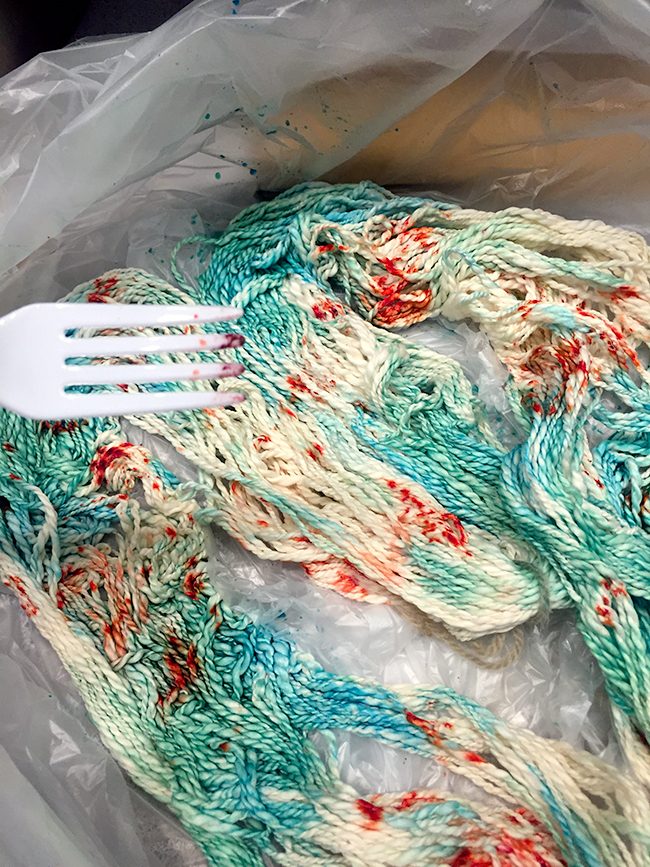
After pouring the blue and green dyes on, I wanted to add some bright red/orange spots (this colorway was inspired by koi fish swimming around in a lovely little pond). To achieve these spots, I dipped a plastic fork straight into the dye powder. Then, I gently touched the tines to the yarn, watching the color bloom from the little dots of powder. Stab a few times until no more color comes off, and repeat until you like how it looks. Two tips about this process: your yarn shouldn’t be too wet, otherwise the dye will bleed too much. Also, to ensure even coverage you might want to carefully lift thicker sections of your skein to be sure there are spots of color on the backside too.
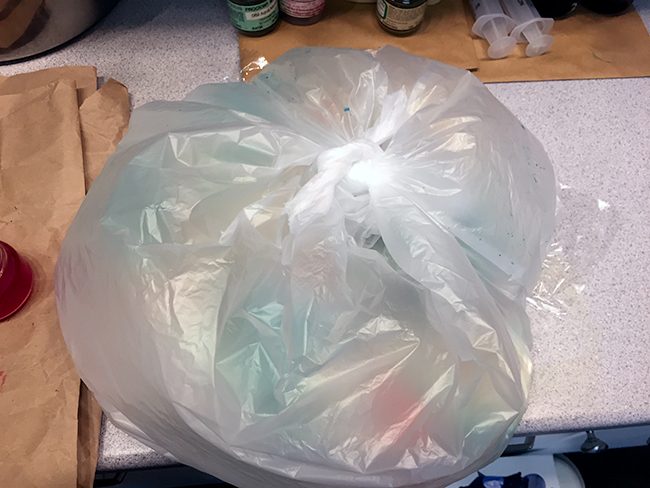
And now the garbage bag makes sense! All you have to do once you’re done applying the dye is gently tie up the bag, keeping a big air pocket in there. I then used the plastic wrap under the bag to help me slide the whole thing onto a baking sheet (or tray, slab of wood, etc.; you just need something flat). The yarn needs to hang out in this bag someplace warm, for 12-24 hours. I stuck mine in the attic on a hot day and left it overnight. Here’s how it came out:
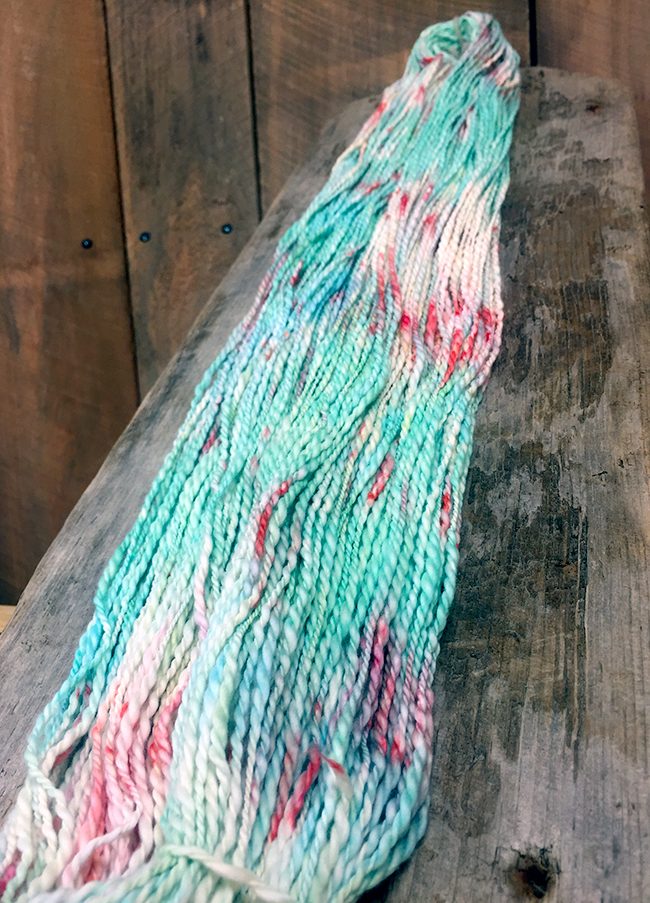
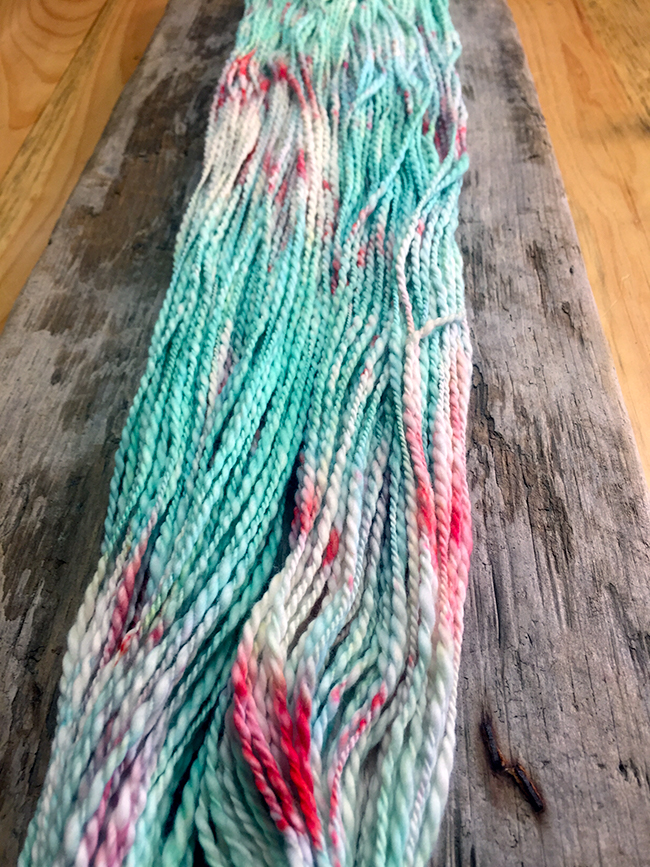

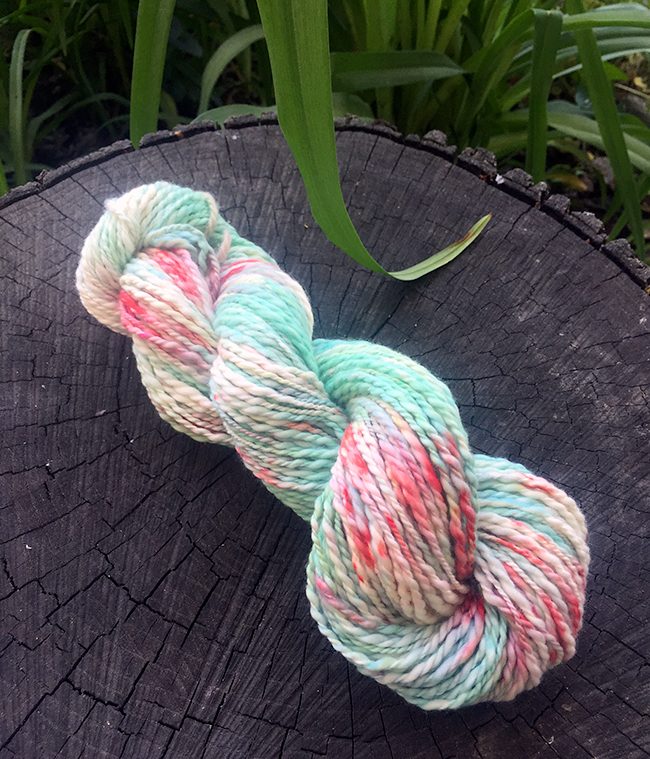
Pretty different from how it looked in the bag, right? I found that the dye took a lot paler than I’d expected. That said, it’s still really pretty! With faded watercolor-like patches of blue and green and those brighter blossoms of scarlet, this colorway ended up looking a little more floral than koi pond. Which brings me to this – the most important thing to keep in mind when dyeing is if you’re a beginner like me, it’s not likely to come out the way you anticipated. If you take your yarn out of the bag and can’t stand the sight of it, still give it a rinse, hang it to dry, and I can almost guarantee you’ll be happier with it the next day. It’s happened to me with just about every single skein I’ve dyed so far.
If you’re feeling colorful and inspired, here are some plant-based yarns that we carry for just such an occasion:
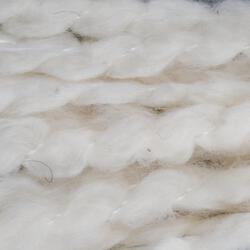
Inca Organic Cotton Yarn is what I used for this project. It’s organic, textured, soft, and probably my favorite yarn ever at the moment. (More on that later this month!)
Lucy Cotton Linen Yarn is a really fun yarn for dyeing. Lucy has an even, rippled texture and is a blend of cotton and slightly darker linen, which means the two fibers will take dye differently, thus making this yarn especially good for tonal or solid shades.

Cathy - Cotton Yarn is also really textured. It has slubs, boucle, and knots that create an overall thick and thin yarn that works best at a loose gauge or sett.
Lastly, Tess Cotton Yarn is good for those of you who prefer something a bit softer with more fluff. Tess is cotton roving spun with a nylon binder thread, which creates a soft, wavy, slightly thick and thin yarn. This one would be great for baby stuff!
Oh, and I can’t forget the dyes! Click here for a complete list of our Procion colors.
Related items of interest: • Our yarns • Medium weight yarns • Cotton yarns • Dyeing Dyes • Fine weight yarns
how colorfast is this process you used? it’s a lot easier than the way i did it.
Hi Ellen! So far, this process has been very colorfast. I did notice that green and turquoise take WAY longer to rinse clear than other colors (I had to wash those ones twice, darn them), but from what I’ve read about those pigments that is not uncommon. This can make it look like the dye is all washing away, but fortunately that isn’t the case. Otherwise, I haven’t had any problem retaining color on these yarns!