In the Loop
Pop A Wheelie! Spin Into Summer Savings
Spinning Wheels • Fibers by the Ounce • Felting Kits • Weekly Inspiration Fresh Fibers & Sweet Savings The Wall-O-Fiber is freshly stocked and full of colorful, textural inspiration! From...
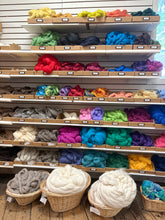
A Grey Day’s Delight: Explore the Wall-O-Fiber ...
If the sky is grey and you need some inspiration, there’s nothing like stepping into Halcyon Yarn and finding yourself face-to-face with a kaleidoscope of texture and color—welcome to the...
Shop In-Person! (Open Every Thursday , Friday &...
Halcyon Yarn is open FRIDAYS from 10:00 am to 5:00 pm for in-person shopping. We are so happy to welcome you back into the store this winter, and we are...
New Weaving Project: Classic Linen Dishcloths w...
When it comes to weaving we love making things for the kitchen, and our new linen dishcloth project is as easy as it is useful.
Welcome to the new HALCYONYARN.COM!
We've launched our new website and we’re excited to offer you a great online experience. Please be patient while we find the ‘bugs’ and get our bearings! Read on for...
E-Spinners: Giving electric wheels a spin
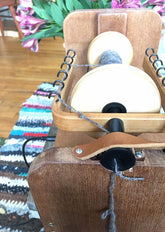
Although they’ve been around for some time, electric spinning wheels (or e-spinners) have been rapidly gaining popularity in the spinning world. I decided to find out why – and here’s...
New Organic Cotton to kick off summer!
The arrival of summer makes a lot of us look to cotton for new projects and inspiration - we've got just the thing! Blue Sky Fiber's worsted weight Organic Cotton...
New! Cotton Bouclé Yarn
A favorite for weavers, Cotton Boucle by Maurice Brassard is now available in 36 colors. On its own or combined with 8/2 Homestead Cotton or Cottolin, you’ll want to...
Norumbega Maine-Spun Wool Yarn
The joy of going ‘up to camp,’ the warmth of a crackling fire, plus durability and designs that will bring coziness to the whole family for years to come –...
Local Yarn Store Day 2022!
This promotion has ended. Thank you all so much for making Halcyon Yarn part of your “local shopping” wherever you shop from! Whether you’re around the corner, or...
Colorful Finds for Winter!
This time of year our craving for rich warm colors goes into high gear, thankfully we’ve got just what you need to brighten the days! Jump into a few of...
Halcyon Yarn Guild Rewards Program
Guild Rewards Program – up to 5% back annually for your guild! When placing orders at Halcyon Yarn (which we hope you’ll do often!) individual members of an enrolled guild...

