Dyeing yarn for beginners – Experiments with effects Part II: The Sequel
Splatter Dye, The Sequel
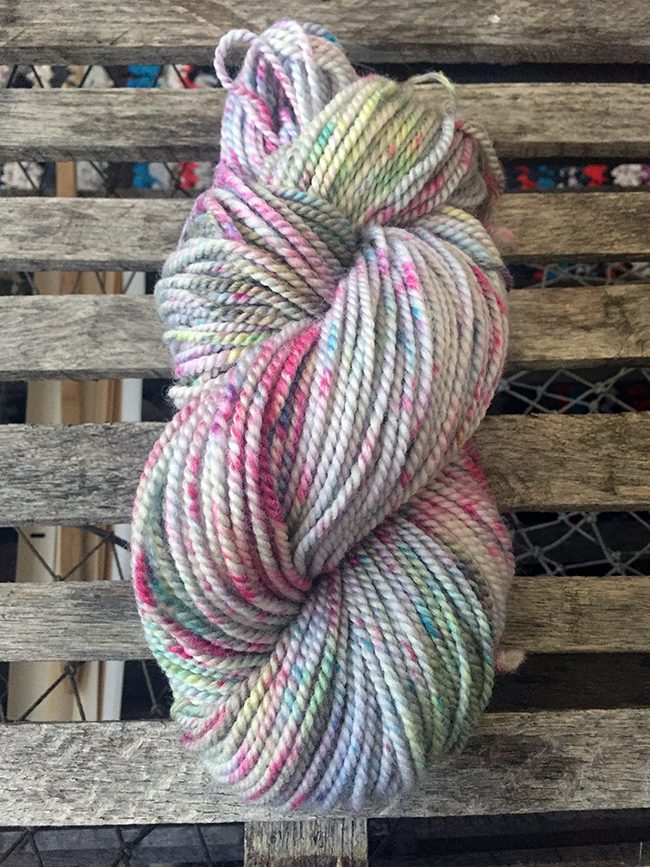
I. Love. Splattered. Yarn. There, I said it. And if you caught my earlier post about trying to accomplish that elusive (to me) effect with my own hand dyeing process, you’ll be interested to learn that I think I figured it out. Using a skein of [Sorry, item discontinued or temporarily out of stock] , some Wash Fast Acid Dyes - 1 oz. 338 Magenta and Country Classic Dyes for protein fibers COC77 Mt Aqua , I managed to get a little closer to my dream yarn.
| [Sorry, item discontinued or temporarily out of stock] |
 | Wash Fast Acid Dyes - 1 oz. 338 Magenta |
 | Country Classic Dyes for protein fibers COC77 Mt Aqua |
The skein I used for this project was actually a casualty from my first splatter attempt. It was meant to be bold speckles of aqua, green and yellow, but it ended up blending together and turning everything an unfortunate shade of booger. This was due to two reasons: The yarn got too wet during the heating process, and I didn’t get it hot enough for a long enough time to make the dye set. So I soaked it in vinegar and water again, squeezed out as much excess moisture as I could, and laid it out on my work surface.
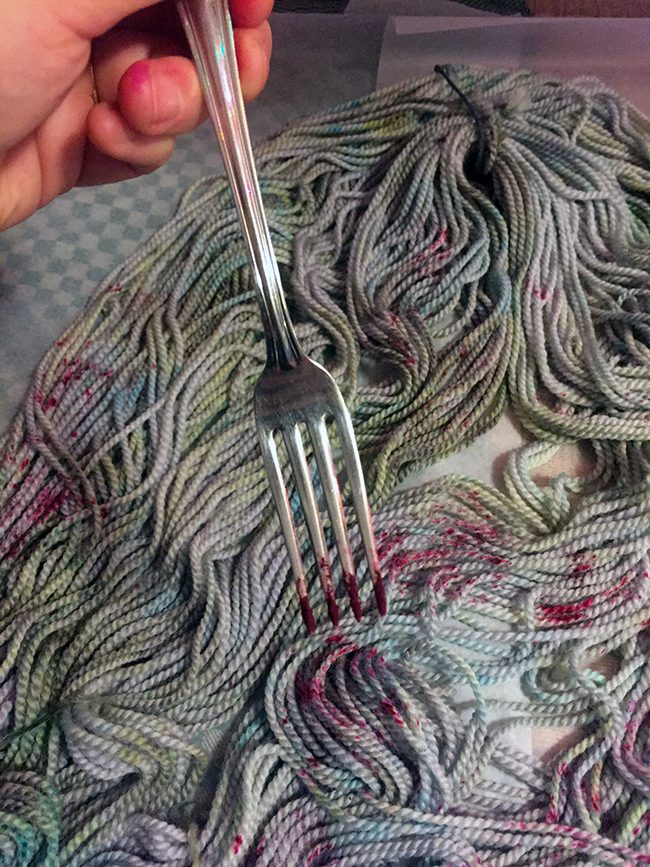
You might be able to tell from the photo, but instead of mixing my dye first, this time I dipped my fork directly into the dye powder. Applying dry dye powder is awesome because it gives you those concentrated spots of color and it stays where you put it with little to no bleeding. However, it can be awful because as soon as a drop of water hits those powder spots, things can get out of hand very fast. You win some, you lose some, right?
After applying the color, you have to heat the yarn for it to set. My first attempt didn’t work because I used my clothes iron on it’s highest steam setting, hovering it over the skein and slowly moving it back and forth for about 10 minutes. Ok, maybe 5 minutes. I can laugh at this now, but anyone new to using these dyes might make the same mistake. So I’m here to tell you: To set your dye, the heating method needs to be hot, even, and somewhat longer than you want it to be (i.e., once it goes on heat and you have a snack, it probably won’t be done by the time you’re done munching).
So. This time I left the damp yarn on the baking sheet, covered it with aluminum foil, and stuck it in a 350 degree oven. I checked it frequently, as I was worried about burning the yarn. After about 30 minutes, I removed the yarn from the oven and allowed it to cool fully. Rinse, dry, and here’s what I got:
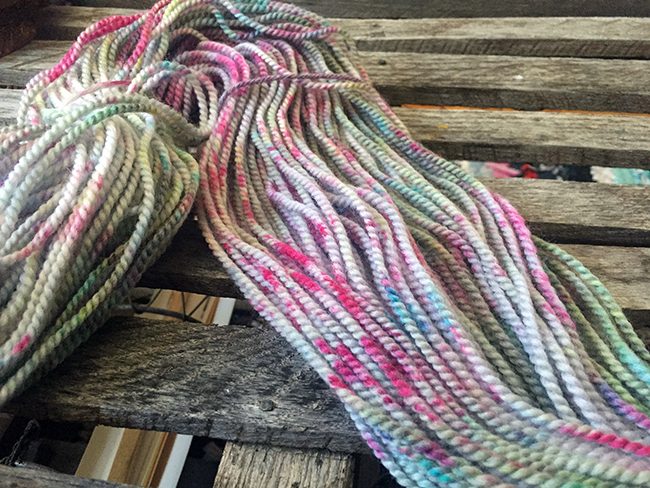
Since the skein of yarn I used for this project (Norumbega Yarn) boasts such generous yardage and is known for its sturdiness, I’m definitely going to make a pair of mittens out of it. Not until after I dye all the white yarn in my house, though!
Related items of interest: • Dyeing Dyes • Our yarns • Medium weight yarns • Wool yarns
