MENU

Fiber Arts Education

Portrait of Gretchen
by: Gretchen

Guild Rewards


Reward Your Guild!

You can earn cash back for your Guild every time you shop with Halcyon Yarn’s Guild Rewards Program! Here’s how:

Participating Guilds earn 5% cash back on all member purchases throughout the year, to be used on whatever your Guild chooses. Buy equipment, hire a teacher, host an event – you decide!

First, the Guild must apply to participate, the application and details are here. (Groups other than guilds may also qualify.) Members identify their guild when they purchase at Halcyon Yarn. Find and link your order to your Guild on the info page, or simply mention it in the comments when you order online, or tell us when you call. At the end of the year we total up all the member purchases and send your Guild a check for 5% of the previous year’s member purchases. Simple!

Want to join a guild?

There are a lot of reasons to join a guild or other organization that supports the craft you love! Guilds foster community among fiber artists as well as providing instruction, and many offer great events, shows, and often have a dedicated space with equipment and materials group members can use. Guilds and other organized craft groups bring so much to the fiber art world as they help expand and pass along skills and knowledge of the crafts we love. Join your local Guild, start a group of your own, or find a group through organizations like the Handweavers Guild of America or The Knitting Guild Association.


For those Guilds that already participate your rewards checks for 2017 have been mailed, along with a special offer for your members – so keep your eye on the mailbox!


Weaving In Your Ends…

Although we often try to avoid it, knitters will inevitably have some loose ends to weave in when completing a project. Like with everything in the knitting world, there are many different ways to accomplish this goal. Below, I’m going to show you the two techniques I most often use when weaving in ends on the back side of your typical Stockinette stitch fabric.

The easy way

This is the way I first learned how to weave in my ends. This method works best on tighter knit fabrics. It does not work very well on dainty fabrics, and you definitely shouldn’t use it on anything with loose, open stitches.

Step 1:


See all those mountains and valleys?  If you look carefully, you’ll see that these mountains and valleys are aligned in columns. Begin by choosing a mountain or valley (in this case, I chose a valley) that is very close to where the end is attached to your project. Insert your threaded tapestry needle under that valley (or “u”) from the bottom up.

Step 2:


Going up in a straight line from that first valley, skip the valley directly above it and then pick up the following one the same way as the first.

Step 3:


Continue in that manner, sticking your needle under every other valley, for a few more stitches. Pull your yarn through, making sure not to tug too tightly. For the sake of showing the stitches SUPER clearly, I’m using a contrasting yarn to demonstrate.

Step 4:

Next, make a U-turn and go back down the line, picking up all those valleys you skipped on the way up.

Step 5:


There you have it! If a yarn is particularly slippery, you may want to repeat this process once more to make sure it is secure. When you’re done, snip the end close to the fabric and call it a job well done.

The fancy way

A really fail-safe way to weave your ends in is simply making a series of duplicate stitches. This works for a broad range of fabrics. I call it the “fancy” way because duplicate stitches have a funny way of intimidating people. Really though, you’re just following along. Allow me to illustrate!

Step 1:

To start, insert your needle under a mountain (or frowny face if you’re having that kind of day) from the bottom up.

Step 2:

 
Next, insert your needle into the valley just above and to the right of the first mountain. Pull yarn through.

Step 3:


Insert your needle through the valley directly to the left of the valley you just came up through, but this time going from top to bottom.

Step 4:

  
Now bring your needle back through the original mountain, from top to bottom.  You have completed your first duplicate stitch!  See that little mountain?  You made that!

Step 5:

 
Continuing with the next mountain to the left, repeat the whole process again.


In the photo above, I stretched out the fabric a little so you can see the full stitch.

Well done! Between these two methods, you’re well on your way to a neatly finished project.

Recommended Tools:

To make this as easy as possible we recommend using a large-eyed yarn needle (also called a tapestry needle or darning needle). You can use a small crochet hook in a pinch, but that is a little harder as the yarn may tend to slip off and the hook may catch threads it isn’t supposed to! The bent tip style can be helpful when lifting individual stitches, as you can move the needle without stretching the stitch.

Here are the needles we recommend:


You’ll also want a small, sharp pair of scissors with a comfortable grip so you don’t accidentally cut something you don’t want to, but can still get nice and close to remove the tail.


Related items of interest: • Multi-Craft EquipmentWeaving Equipment

Portrait of Kate Comaskey
by: Kate Comaskey

Have a Crafty New Year!


Happy New Year!

The holiday projects are done and now you finally get to pick something for yourself (or if you’re like me you are still finishing your mom’s gift). Let’s make 2018 a great year to get crafty and take your fiber arts interests to the next level. Last year, here at the store we did some big renovations to make more room for yarn and tools, and to make it a more comfortable space to come in and get help, browse our unique selection, or just hang out. We’ve got more treats in store for the year ahead!

If you haven’t been by the shop for a while there’s plenty to check out, and there’s plenty of space to bring a project and just sit and knit or weave away an afternoon surrounded by inspiration… Remember, we’re now open 7 days a week year round!

Monday – Friday: 10am – 6pm

Saturday: 10am – 4pm

Sunday: 11am – 4pm

We also host free drop-in groups that you’re welcome to join at your convenience:

Monday Night Knitters 6:00pm – 8:00pm

Tuesday Twisted Spinsters 10:00am – 2:00pm (feel free to bring a lunch too!)

Weave Share Third Wednesday of each month at 6:00pm (starting again in February)

Please call or email with questions, or just pop in!

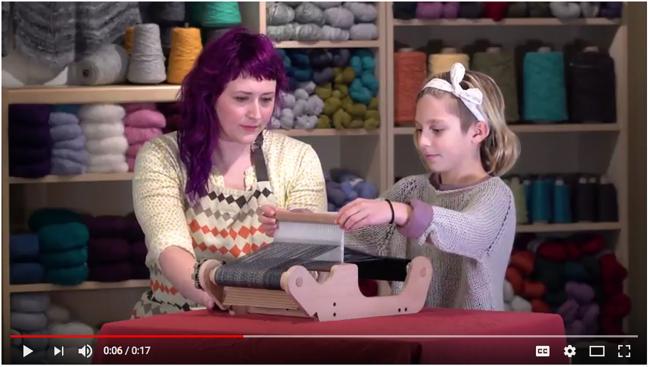
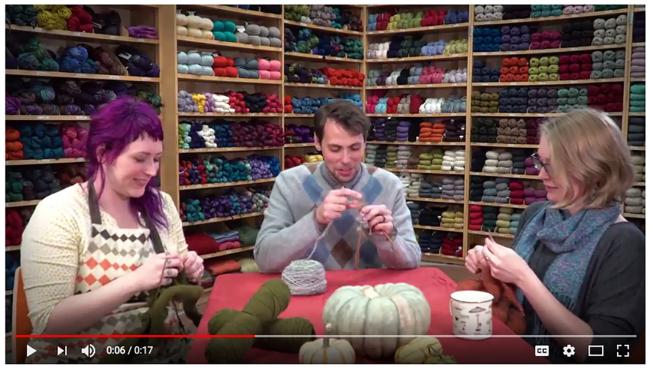
Did you catch our new commercials?

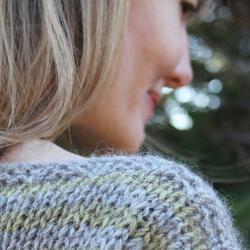
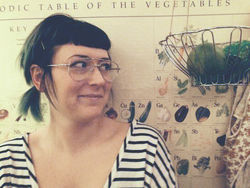
There’s nothing like a handmade project for spending time together, or the thoughtfulness of a handmade gift, but sometimes it can be intimidating to get started – we want to let everyone know there’s something at Halcyon Yarn for everyone, every craft, and every skill level, and we’re here to help. We made some new commercials this winter to give you a glimpse into the shop and some of the talented and friendly folks (and families) that work here. Let us know what you think! We welcome you to stop in and let us help you make something special, for someone special!

Mid-Winter Classes

Perhaps your New Year’s Resolution is to try something new? Or maybe you’re looking to perfect some skills that have been collecting dust. Why not check out our upcoming classes? We’ll be adding more soon, so if you don’t see something you’re looking for certainly stay tuned as we’ll have more rigid heddle, weaving, knitting and crochet classes coming later this winter and spring, plus fun events are in the works already for summer! If you’re visiting from a little further away, check out more about the Bath, Maine, area here: visitbath.com

Tapestry Weaving: Beginning and Beyond with Barbara Burns

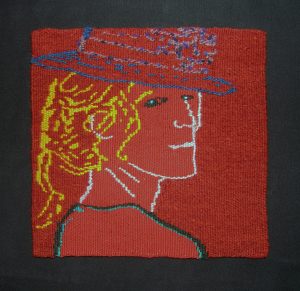
January 26th – 28th, Friday – Sunday, 9:00am – 4:00pm

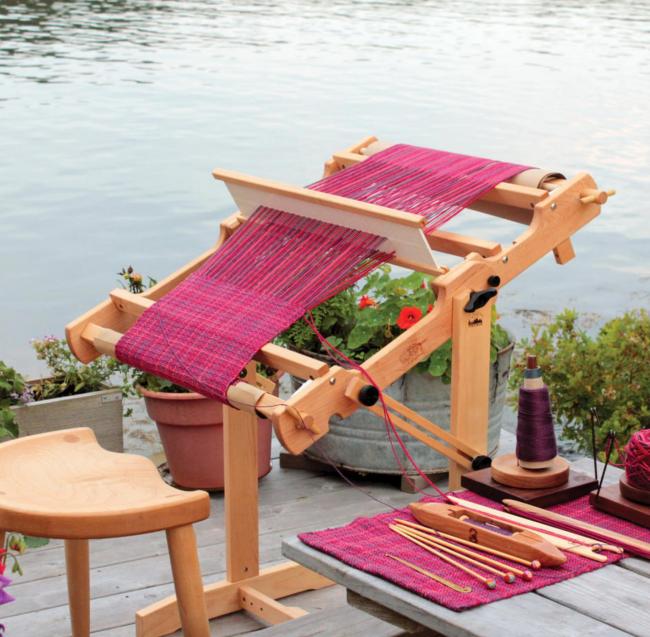
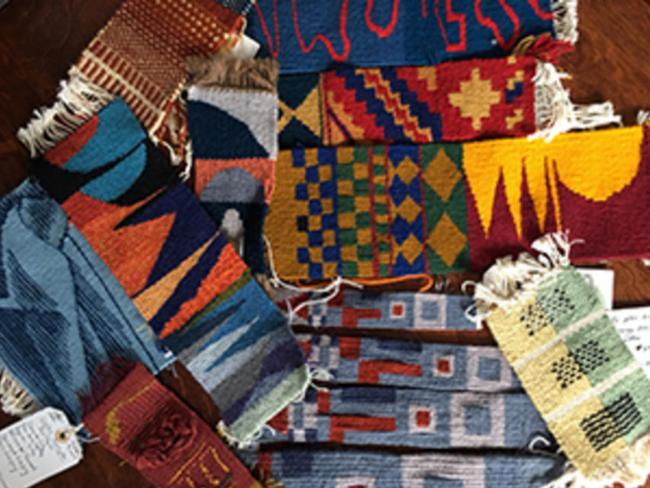
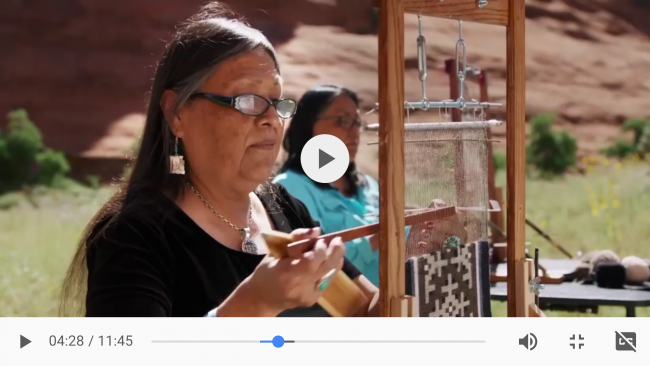
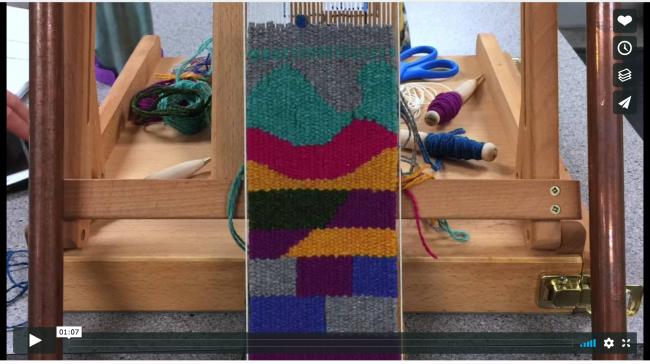
Have you ever wanted to try tapestry weaving, but didn’t know where to begin? Or, perhaps you’ve tried it on your own and are ready for some help. In this intensive, three day workshop you’ll learn the fundamentals of tapestry weaving. You’ll be guided step-by-step through various techniques while exploring the creative possibilities of tapestry weaving. Beginner and intermediate levels are welcome, but no previous weaving experience is necessary. Check out the video below for a look into one of the Beginner and Beyond classes here at Halcyon!


Begin to Spin, with Linda Clutterbuck

Two Consecutive Saturdays: February 3rd & February 10th, 10:00am-2:00pm

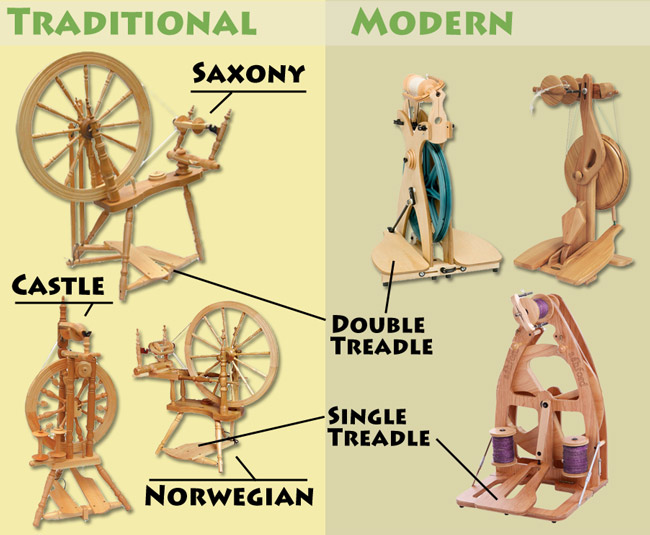
This is a two day class for anyone ready to learn how to spin on a spinning wheel. Class meets on two consecutive Saturdays, and no experience is needed. Materials provided.

You may rent a spinning wheel from Halcyon Yarn for the duration of the class, or bring your own in good working order. Rental fee is $30.00 and may be applied to the purchase of a wheel within 30 days. Please talk with us when you register to determine which wheel you’d like to use, rentals must be arranged prior to the start of class.


Next Steps in Weaving, with Sybil Shiland

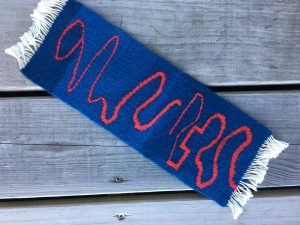
February 23th – 25th, Friday – Sunday, 9:00am – 4:00pm

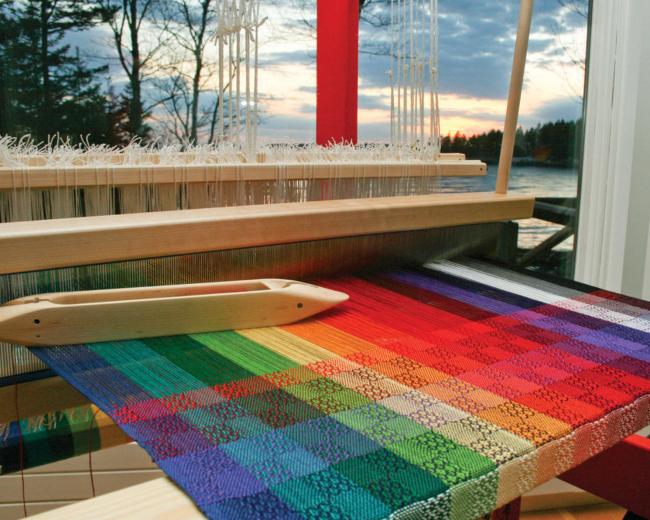
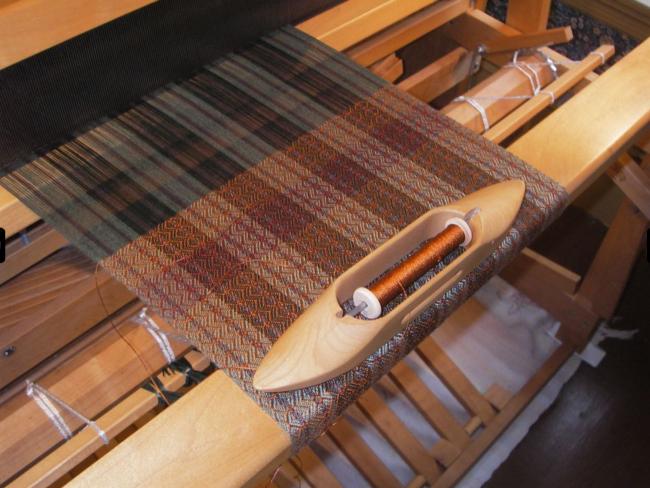
This is a project based class designed to aid students in reviewing and consolidating skills acquired in a beginning weaving class. Students will weave two or more dish towels in a weave structure and color-way of your choice (kit materials will be provided). You will be using Halcyon Yarn designed patterns for twill, plain weave, or waffle weave towels. Participants should have some weaving experience and/or have taken a beginning weaving class. Students should be familiar with the basic warping process as they will be winding the warp for their project at home before the class. Detailed instructions on making the warp will be included. Each student will warp and weave their projects on one of the classroom looms. Students are welcome to bring their own loom if they would prefer, please let us know when registering so that we can coordinate with you to set it up prior to the class.


Woolen and Worsted with Linda Clutterbuck

Saturday, March 3rd, 10:00am – 2:00pm

Do you understand the basics of spinning? Are you ready for the next step? Do you know the difference between woolen and worsted spinning? Semi-woolen and semi-worsted? Roving and top? Twist and grist? Balanced and unbalanced skeins? This workshop will cover all these topics so you will be able to advance your spinning skills and spin the yarn you want! Have all your questions answered and trouble shoot technique in this hands-on class for those with some basic spinning experience who’d like to take their twist a little further! Experienced spinners will find Linda’s knowledge helpful and very in-depth, so this is a great refresher class too!


Learn to Spin Yarn on a Drop Spindle with Lesley Fowler

Saturday, March 10th, 10:00am – 4:00pm

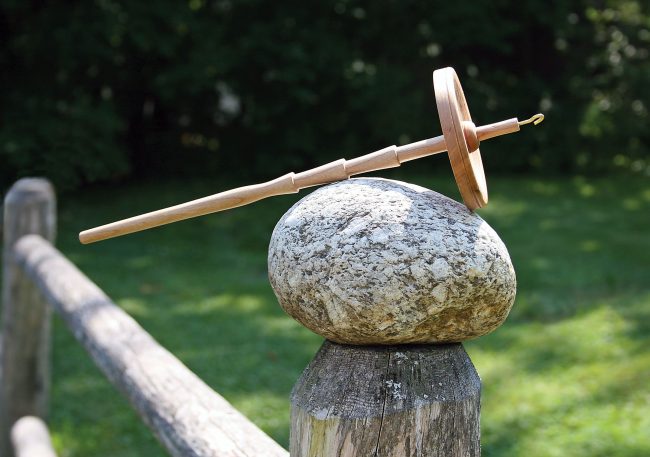
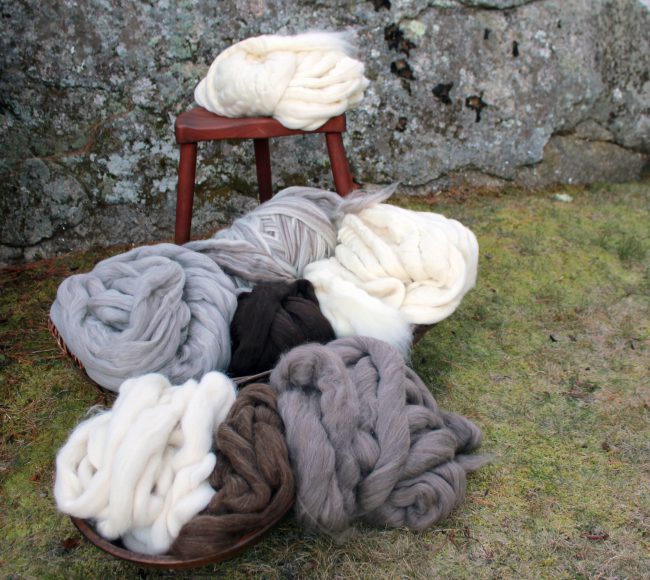
Spend the day learning how to spin yarn on the drop spindle! This introductory class will spend the first hour teaching you the basics of how to use the drop spindle… it’s really that easy. Then spend the rest of the day learning great tips and techniques for how to spin the yarn you want. You will draft single and two ply yarn using both plant and animal fibers. Learn how these fibers behave differently as they are spun and made into fabric. Control color in your spinning during carding, drafting, and plying. You will “finish” the small skeins that are made during the class and leave ready to keep on spinning on your own!

For more information please visit halcyonyarn.com or call us at 800.341.0282, we hope to see you here soon!


A little housekeeping…

You’re receiving this email because you signed up for our Regional Email Newsletter. We send this out about once a month when we have news to share regarding activities that are happening in the store, or that may be of  interest to the local/regional fiber arts community. If you know of something that’s going on nearby that may be of interest to fellow fiber folk, please let us know! Please let us know if there are topics you would like to learn more about or features you enjoy, we want to make this a valuable and fun resource for you so your feedback is welcome.

We also send a more broad ranging email newsletter a little more frequently (about once a week), with content that’s separate from this local newsletter. The regular Email Newsletter covers everything from new products and special offers, to tutorials and how-to videos, as well as our favorite fiber art inspirations and musings. If you’re not already, we hope you’ll sign up for that as well so you never miss a !

You can unsubscribe (although we hope you won’t!) or manage your subscriptions at any time. We absolutely never sell, rent or share your email address or other information to any outside parties, we’ll only ever use it to communicate with you directly and securely.

You can also find us on Facebook, Instagram, Ravelry and Twitter. We love to see and share what you’re working on so please tag us when you share your projects!


Thank you for being a part of the Halcyon Yarn community – we look forward to staying in touch in 2018 and we wish you happiness, good health, and plenty of yarn!


How To: Pom Poms!

Here at the store we’ve been on a serious pom-pom kick, we think you will be too when you realize how easy and fun they are to make. Everything looks better with a pom-poms!

The Clover Pom-Pom Maker is a clever little tool for making perfect pom-poms every time. Fast and easy to use, each set includes two sizes of Pom Pom Maker, approximately 2.5″ and 3.5″ each. You’ll only need about one half to one ounce of yarn, or approximately 50 yards of worsted weight yarn to make the larger size. The thicker the yarn, the less yardage you’ll need. Mix and match colors, throw in some sparkle, try making stripes… there’s no limit to the fun textures and look. Each pom pom has it’s own character – just check out the video above to see for yourself!


Go ahead, try to make just one! We think once you get rolling (or wrapping) you won’t be able to make just one of these fun little stash-busters. Of course pom-poms are the perfect finishing touch on a favorite stocking cap… They’re also great for holiday decorating – think garlands, tree ornaments, or little woolen snowballs tucked into a centerpiece on your holiday table. Add one to a zipper pull or clasp on a bag, or make a bunch and create a pretty mobile for a child’s room. We even pop them on the tops of pens here at the store to dress up our desks!

Grab a pom-pom maker now and get ready for stash-busting, decorating fun!


Related items of interest: • Multi-Craft Equipment

This is the year to learn weaving!

Whether you want to work on a little rigid heddle loom or advance your skills on an 8 shaft floor loom, we’ve got a class for you! Our spacious and well-equipped classroom studio is a wonderful space to spend a few days learning to weave. Plus, if you’d like to keep working on your project after the class we make the studio available to students for the week following the class. In the case of rigid heddle looms, you can rent the loom following the class so you can continue to work at home. Materials are included and all equipment and tools are either provided or available to rent. Please call or email for more details or with questions.

Plus, as the holidays approach stay tuned for quick and fun fiber arts “make it, take it” days, and make this a handmade holiday!

Here’s what’s coming up:

Intro to Rigid Heddle Weaving • Saturday & Sunday, October 28 & 29 • $195.00

Weaving 101 – Weaving on a Floor Loom • Fri, Sat, Sun, December 1st – 3rd • $295.00

Next Steps in Weaving • Fri, Sat, Sun, December 8th – 10th • $295.00

Tapestry Weaving: Beginning and Beyond • Fri, Sat, Sun, January 26th – 28th • $275.00


Knit Tips: Demystifying the Double-Knit Headband

In my experimental teenage years, online knitting tricks and tutorials weren’t quite as readily available as they are these days. So when I wanted to try knitting a plain 1×1 rib with black purls and red knits, you can imagine my surprise when I eventually realized I was just knitting two pieces of fabric, back to back! Once I identified what this technique actually was, I declared myself an official expert on double-knitting and never tried it again… Until now!

Sad as it is, we are fast approaching the end of summer. It won’t be long before we’re searching for projects to keep us warm when the days start to get a little colder (or a lot colder, if you live here in Maine). A popular project here at the shop as we approach the holiday season is the Double knit headband. It requires minimal yardage; the pattern calls for sport weight yarn in two colors, about 120 yards each. Although it’s small, this pattern packs a bunch of techniques into such a little accessory. You have double-knitting, following a chart, a provisional cast on and even some grafting at the end. This is a great project for those looking for a challenge, or to hone your skills on some of these techniques.


I gave it a try with one skein of our [Sorry, item discontinued or temporarily out of stock] and a mini-cone of JaggerSpun Maine Line 3/8 Yarn.  Here’s a little bit of my process:


First, you use a crochet hook and scrap yarn to make a provisional cast on.  This is just a crocheted chain that you pick up stitches from.  Be sure to pick those stitches up on the wrong side of the chain (the side that doesn’t look like a neat and tidy braid).  I picked my stitches up wrong, so don’t feel bad if you do too.  This provisional cast on makes it so that you can pick up and knit from both sides of the chain, which is how you begin making your two-sided fabric.

After knitting a few rounds of each color, you pick up stitches along the bottom using a second needle. This is when it helps to have picked up from the crocheted chain properly; once you’ve picked up all those stitches you should be able to simply unravel the chain, but I ended up having to undo the whole thing slowly by hand. Totally OK, but I’ll try to do it right next time! Anyhow, the photo above is after all stitches have been picked up. Both needles are held together and the fabric is folded with wrong sides facing each other. Then you knit those onto one needle, alternating between first a front stitch, then a back stitch. The dark blue you see is my MC (main color), and the pink variegated is my CC (contrasting color).


The thing to remember is that you’re not carrying anything along the back (or front) of your work. So when you go to knit a stitch, make sure both strands of yarn are at the back. When you’re about to purl, both strands need to be in front. Also, think of every two stitches as a pair. For every stitch of the front fabric you knit, you will then purl a stitch of the back. So in the photos above, the blue stitches are all front stitches and the pink ones belong to the back. This gets a little more complicated once you begin working the charts, of course.

Once you understand the two-sided fabric part, it’s really a very straightforward piece. Choose one of the designs from the pattern, make up your own, or create a solid colored headband. Our [Sorry, item discontinued or temporarily out of stock] is a fun option, but you could also use [Sorry, item discontinued or temporarily out of stock] , Jo Sharp Classic DK Wool Yarn, or even Malabrigo Arroyo Yarn.


To sum it up: Your yarn might get twisted, you may forget where you’re at in the chart and you might even have to backtrack once or twice – but that is really all part of the process, isn’t it? The end result is a cute, warm reversible headband that can be proudly donned by the whole family.


Related items of interest: • Knitting PatternsOur yarnsFine weight yarnsWool yarnsLight weight yarnsMerino Wool yarns

Portrait of Kate Comaskey
by: Kate Comaskey

Tapestry Weaving at Halcyon Yarn


Continuing Education in Tapestry Weaving

Halcyon Yarn is a great place to learn or advance your tapestry weaving skills, and to find excellent resources and products.

It’s been a pleasure hosting Barbara Burns and a wide range of tapestry students for her workshops. The excitement and creativity flows throughout these workshops. Taking a Line for a Walk – Continuing Education in Tapestry Weaving just wrapped up last week and it offered students a deeper dive into the technical aspects of tapestry weaving.

Students of various skill levels worked on how to control a line within the tapestry, honing the skills of choosing where and how any two colors in composition meet, whether it is a thin line or a large shape. Students learned how to weave a smooth line of consistent thickness no matter what direction it travels. Students explored using highs and lows, stealing and stepping, to create smooth curves and angles. This class provided the opportunity to work on the tapestry surface, warp and weft tension, work in opposing sheds, consider weft thickness vs. warp, sew slits, and other skills.

An excellent next step for the beginning to intermediate tapestry weaver with some experience, or for a seasoned weaver who wants to sharpen skills. We’ll be offering this, as well as introductory tapestry weaving, again this winter. Check the class calendar for more dates soon!

About Barbara Burns:

Instructor Barbara Burns studied tapestry at West Dean College in Sussex, England. She has also studied here in the US, most notably with Archie Brennen and Susan Martin Maffei. She has taught private students and workshops in NY and Maine. Barbara’s tapestries have been exhibited both nationally and internationally. She has received awards from as far away as Serbia and England.

Barbara also contributes to the American Tapestry Alliance through her blog on the Mastering of Self-Promotion as an artist. This wonderful resource is a great tool for those looking for “the tools you need to promote your work in a professional manor…”. Please visit Barbara’s blog here for further information on topics ranging from writing artists statements to the business of art and selling. Barbara will be among the fiber arts demonstrators at Halcyon Yarn’s Open House on Saturday October 7th as well.

The video below gives a brief look into a Tapestry Workshop that took place earlier this year at Halcyon Yarn. It’s a great overview of what you can expect if you plan to join us for a class!


TWiNE (Tapestry Weavers in New England) at Halcyon Yarn: September 30th

We are also excited to announce that we will be hosting the Tapestry Weavers in New England at Halcyon Yarn this month! Join TWiNE on Saturday, September 30th at 1:00 pm for a tapestry show-and-tell and discussion.

TWiNE, one of several regional tapestry weavers groups in the United States and Canada, was established in 1991 to support contemporary tapestry artists from New England and afar. TWiNE consists of approximately 45 members with experience ranging from full-time professional artists to fairly casual weavers, including teachers, textile professionals and gallery owners. TWiNE members have put on numerous group shows in their 23 year history.

In addition to showing members’ work, TWiNE also focuses on educating the public about contemporary tapestry design and technique. Membership is not limited to residents of New England and currently includes members from every New England states as well as California, New York, Colorado, and Canada. Currently. Members organize three meeting a year. They share news of their own work and projects as well as maintaining regular contact through email.

The event does not require registration and is free – we hope you’ll join TWiNE and Barbara Burns at Halcyon Yarn on September 30th!

Past blog posts, and member work can be seen here: TWiNE


Portrait of Emily Werner
by: Emily Werner

Highlights from NEWS!


New England Weavers Seminar 2017

Gretchen and I recently took Halcyon Yarn on the road! We had the pleasure of attending the New England Weavers Seminar at Smith College in Northampton, Massachusetts. The New England Weavers Seminar, or NEWS, is held every two years and is a highly anticipated event for weavers in the region. It is a long weekend full of classes, lectures, shopping, and galleries showcasing the work of newcomers and established weavers side by side. With over 350 attendees, dozens of classes, tours, lectures, exhibits, and unique vendors all in one beautiful place, NEWS is a great opportunity to connect with a vibrant weaving community. To stay up to date on details and make your plans for NEWS 2019 please visit their website, and sign up for their NEWSletter.

 
For anyone on the fence about attending NEWS (or other weaving conferences), I’d like to say, go for it!! I met so many interesting weavers and saw so many interesting textiles that my head is bursting with new ideas! I can’t wait for NEWS 2019. We hope to see you there!

Gretchen and I rented a van and filled it with as many of Halcyon’s signature yarns, tools, and books as we could! It was lovely meeting and talking with so many passionate members of the weaving world, many of whom have been shopping with us for decades. We also saw lots of new faces that we hope to see again in the future! In addition to vending with Gretchen, I was lucky enough to take several classes over the weekend, ranging from the history of weaving with Marjie Thompson, to sewing with handwoven fabric with Sarah Jackson, to card weaving with Marilyn Romatka! Before this weekend, I’d only taken one formal weaving class. Being a mostly self taught weaver, this weekend was a great opportunity to converse with other weavers and learn from their experiences. You can only learn so much out of a book!

Gebrochen examples, from Marjie Thompson’s class.

A great tool for analysis, recommended in Marjie Thompson’s class.


Card weaving, from Marilyn Romatka’s class.

One of the most exciting things about the weekend was witnessing firsthand the importance of weaving guilds. I had a chance to see the Traveling Library, which is a collection of over 50 notebooks of handwoven swatches and drafts created over the years by NEWS guild members, who are then able to borrow the notebooks for study and inspiration. It is a reminder of the way that weaving drafts were shared in the past. Before weavers had easy access to unlimited weaving books and online sources, handwritten drafts and samples were passed from weaver to weaver. (Remember, if you’re a guild member, take advantage of Halcyon Yarn’s Guild Rewards program!)

New Santa Fe colors, in the Organic Cottolin Tea Towel kit – coming soon!

Congratulations! Chris P. of Northampton, Massachusetts is the winner of our booth “door prize” at NEWS. Halcyon’s Organic Cottolin Tea Towel kit in our new Santa Fe colorway is headed for your loom. Thanks, Chris, and everyone who stopped by! If you visited our booth, this kit was being woven on the Louët Jane 70 cm (27.7") 8-Shaft Table Loom, also available in a 15.5″ size, both with optional stands. These kits will be in stock soon at the store so stay tuned for their official release next week!


Seeing the library and guild exhibits really brought to light that strong sense of tradition and community in the weaving world, as did the evening lectures on the first and last nights from Tom Knisely and Lynda Teller Pete. I’ve seen numerous books and articles by Tom Knisely, but I had no idea he was an avid antique textile collector! His lecture was called “What We Can Learn from Antique Textiles,” and he brought some pieces from his own collection and even generously passed them around the room for us to gawk over. Tom is a very engaging speaker, and his delight in the craft is contagious. His favorite pieces (and the ones that told the best “stories”) were the ones that had worn away in spots or been lovingly mended. Rather than being disappointed by holes in the fabric, he looked at them as an opportunity to see exactly how the fabric was woven and used. While we may never know exactly who wove these early textiles, Tom and many of us in the audience enjoyed speculating about the anonymous weavers and owners of the textiles.

Lynda Teller Pete’s lecture was equally fascinating. Lynda is a fifth generation award-winning Navajo weaver and her lecture was called “They Will Know Our Names.” She spoke about her family’s legacy, where weaving lessons are mandatory and weaving is viewed as a “way of life.” The Two Grey Hills pattern is a traditional design that has been woven into rugs and tapestries by the Teller family for generations. It was fascinating to see how each generation interpreted the pattern a little differently. Hearing about the amount of skill and passion and history that goes into each and every piece woven by the Tellers was inspiring and it was wonderful to hear how highly valued weaving is within this family.

Learn more about Lynda, and her family, in the Craft In America: TEACHERS episode, from PBS.


Related items of interest: • Weaving Equipment