MENU

Fiber Arts Education

Portrait of Sierra Roberts
by: Sierra Roberts

Hand dyed roving – do it yourself!


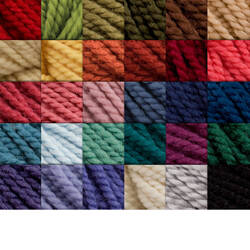
Not just for yarn… Dyed Roving!

There’s something about a braid of hand dyed roving that never fails to excite me. It doesn’t usually matter what the colors themselves are – it’s more about how those perfect blotches of color can be so concentrated in one spot, fading and blending with other colors in another…  It’s essentially a super thick hand-dyed yarn, so it showcases your hard work in a much more obvious way. But then you can transform that beautiful thing into something so different, you won’t even believe the yarn you just spun came from that original braid. Like the Nube by Malabrigo Yarn I spun a while back (dubbed Velocicrafter).


As I learn about dyeing fiber, I’m gradually becoming more confident about the process. Confidence is definitely required when dyeing roving and other un-spun fibers, because they’re a little harder to work with than yarn. Most importantly, you have to be super careful about not letting the fiber mat or felt, so be patient with the process. This can be tricky for sure, considering how hot you have to get things to make the dye set. Here are a few points to always remember when you’re dyeing fiber (and yarn, for that matter):
•  Once it’s time to heat things up, do it gradually.  The fiber should be wet and in the pot before you turn that burner on.
•  Manipulate the fiber as little as possible. Even when you’re squeezing out excess water after the pre-soak, be gentle – press, don’t wring or agitate. When everything is cooking in the dye bath, only move it around if you have to and even then, be as gentle as possible.
•  Always allow the fiber to cool COMPLETELY before rinsing. If warm wool meets cool water, you’ve got a pretty good chance it won’t be so soft and easy to spin afterwards.

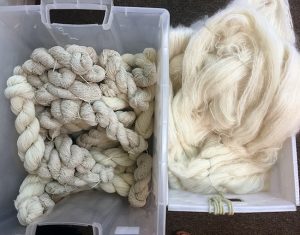
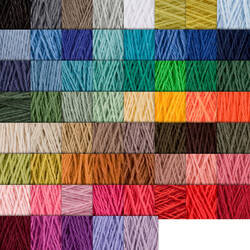
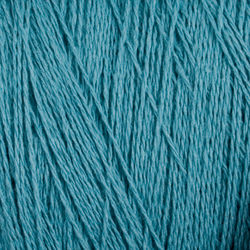
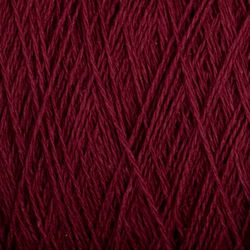
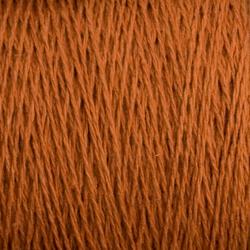
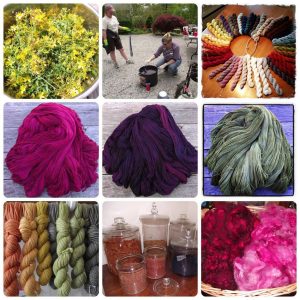
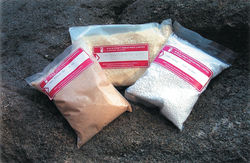
Ok, that’s enough lecture time. On to the experiment! I chose one ounce each of three different fibers to dye: [Sorry, item discontinued or temporarily out of stock] , [Sorry, item discontinued or temporarily out of stock] , and Finn Wool Fiber.


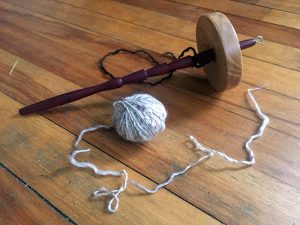
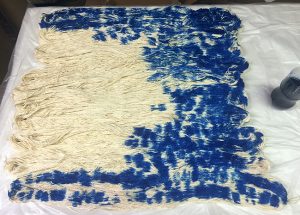
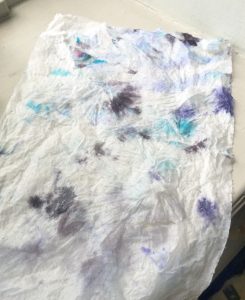
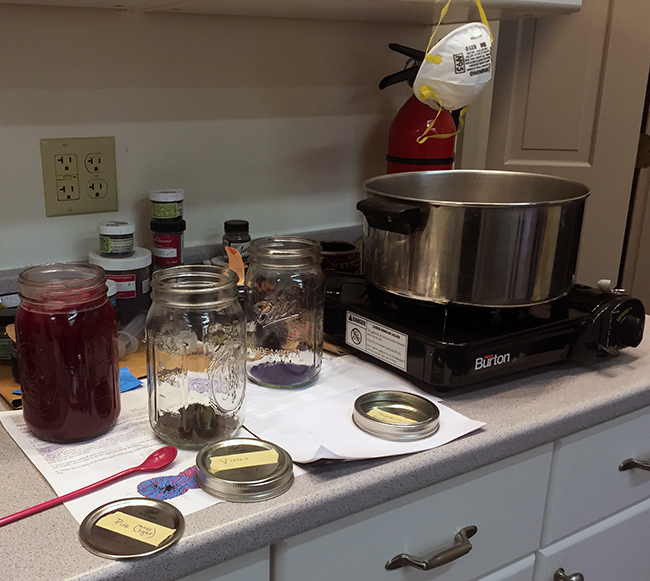
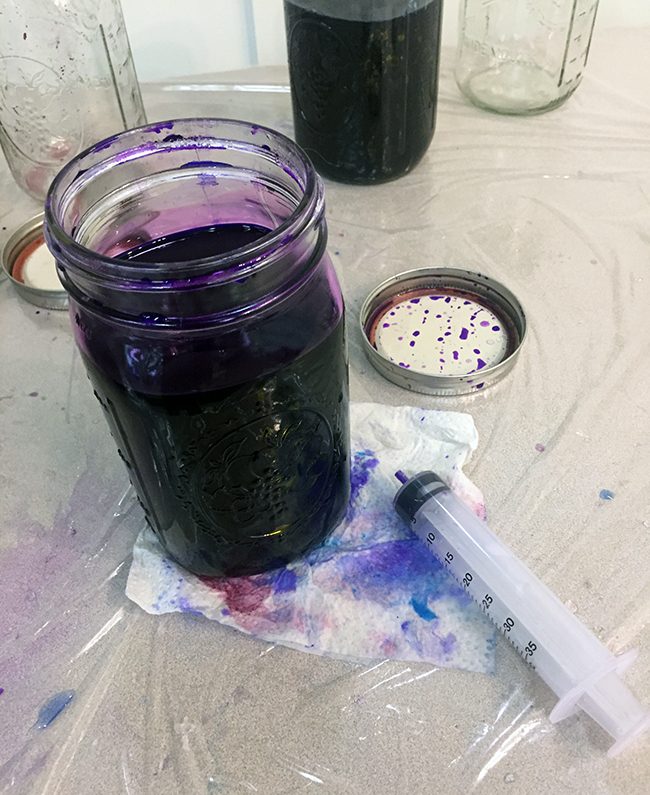
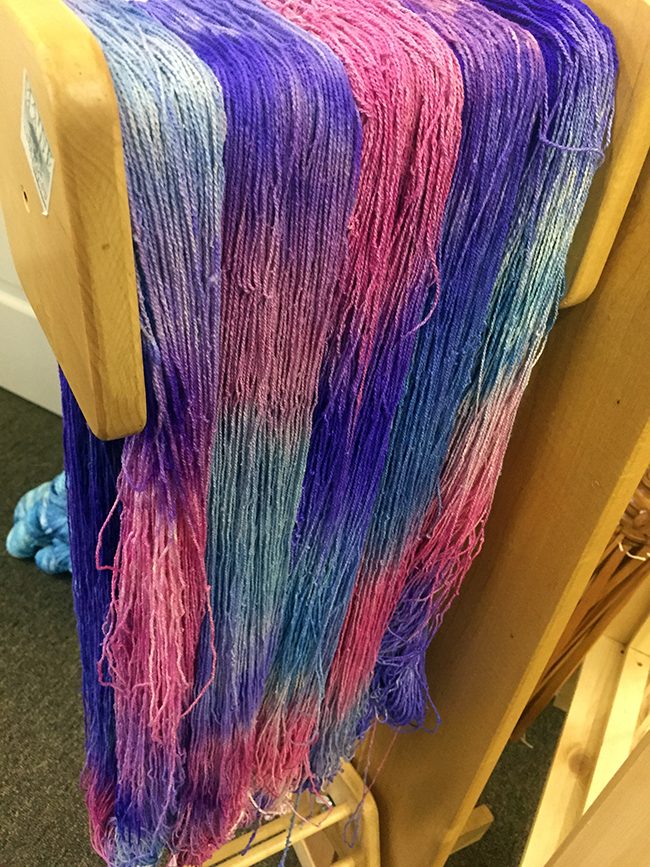
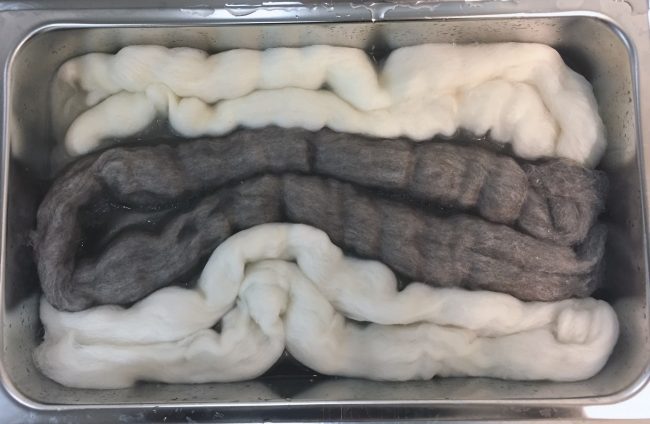
These soaked for a bit in water with a little sprinkle of Citric Acid Crystals, 8 oz. GKHCIT.8. Then I removed some of the water and started applying dye, using a kettle dyeing technique.


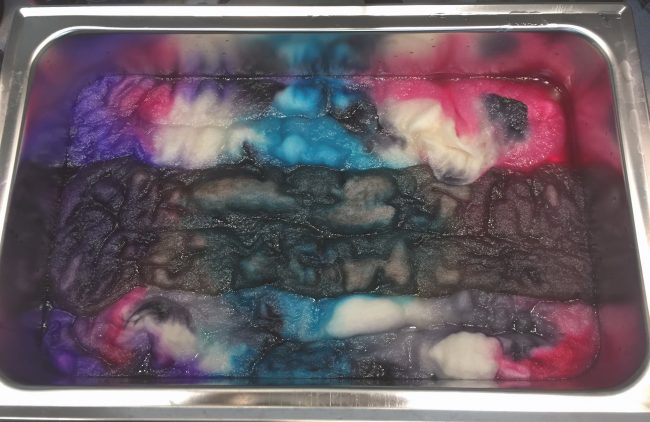
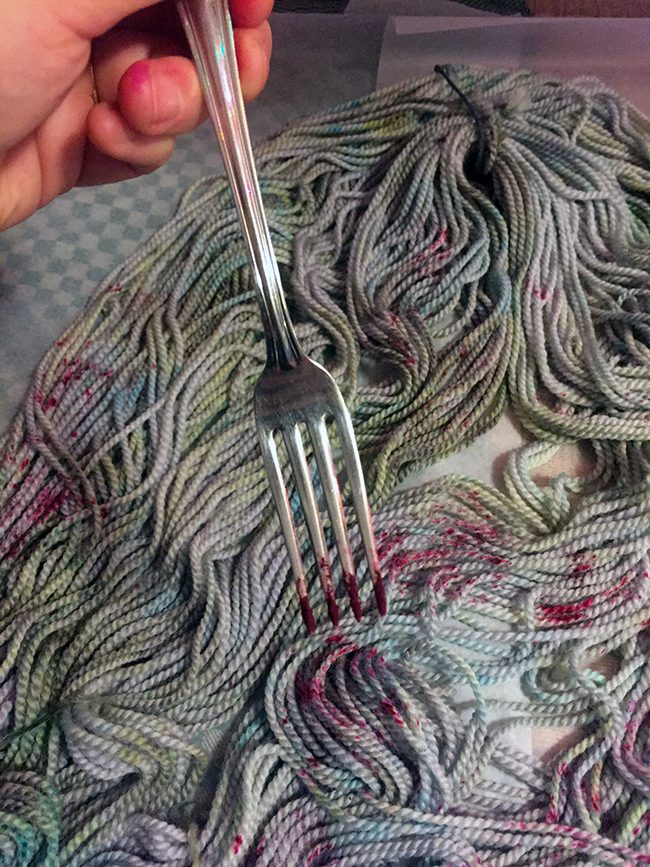
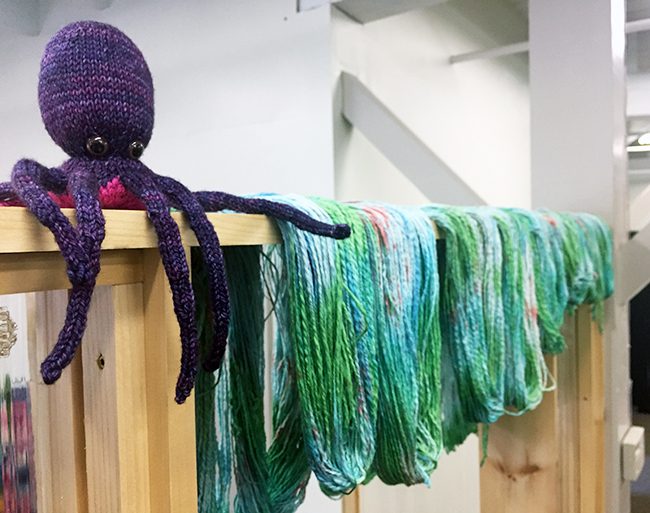
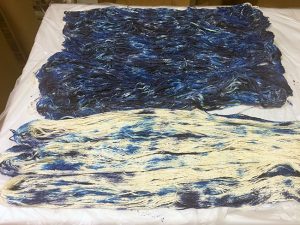
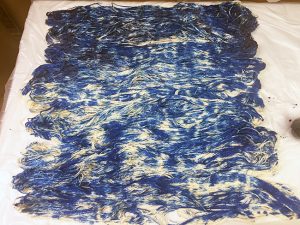
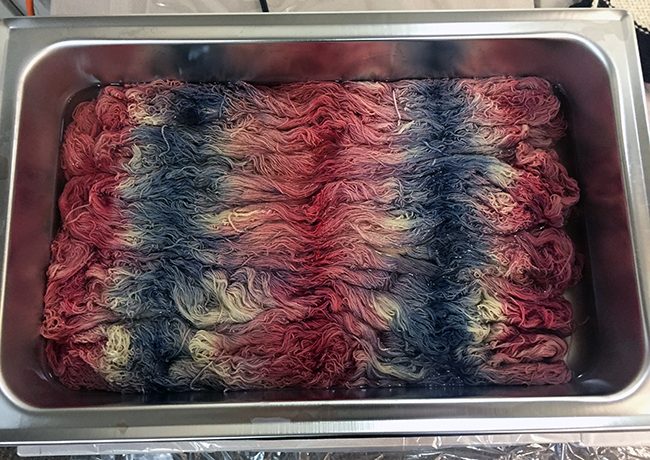
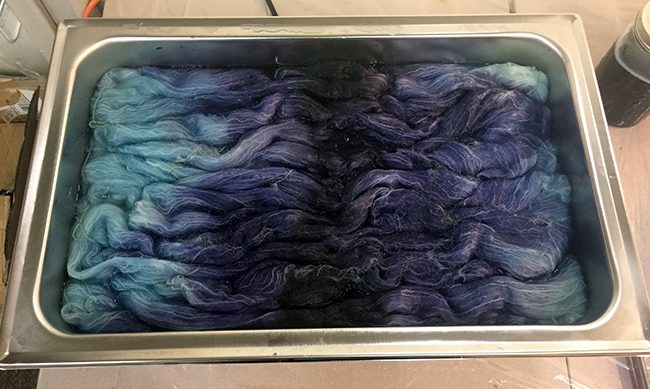
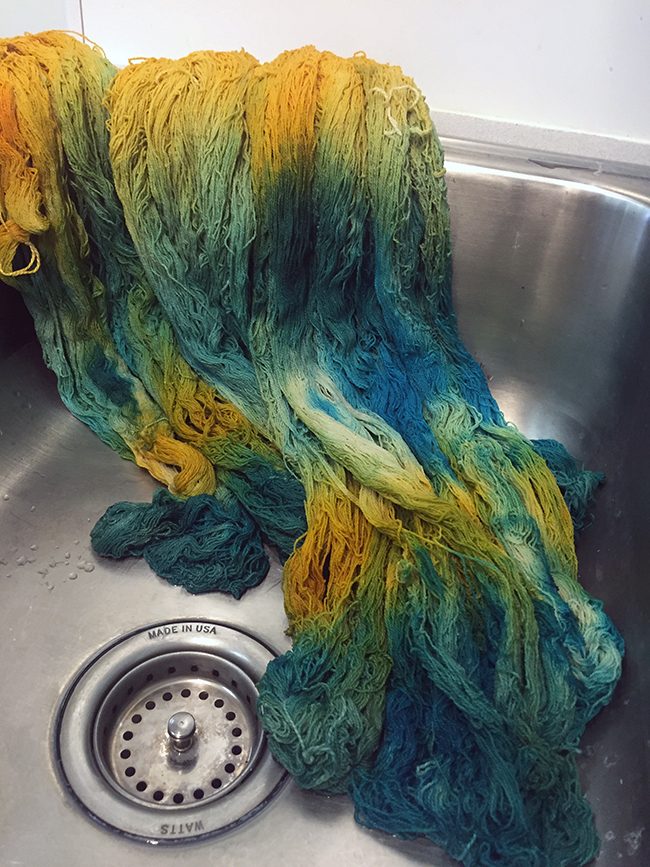
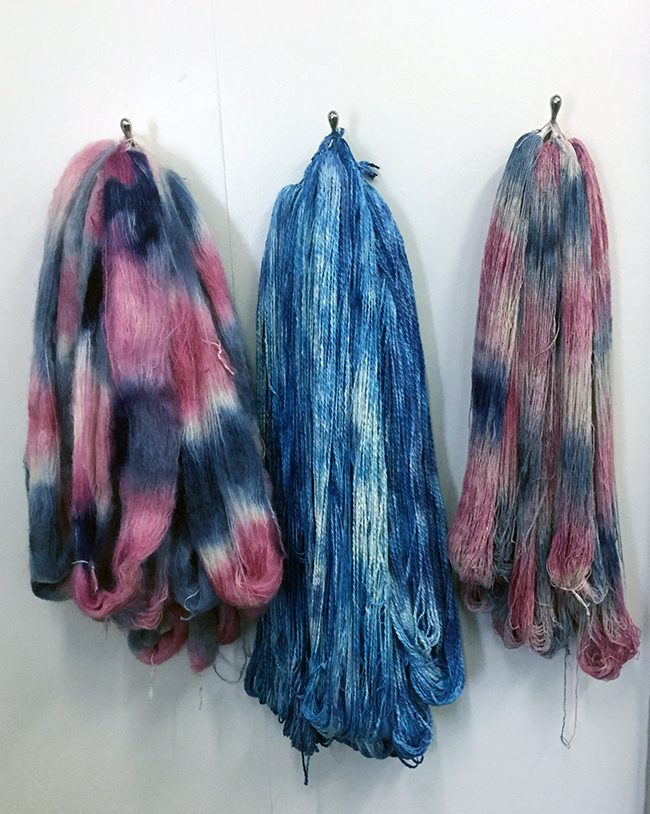
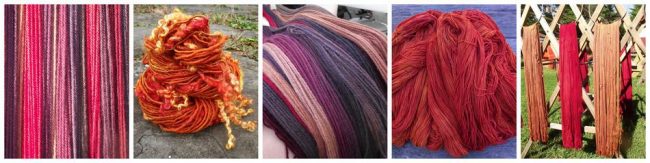
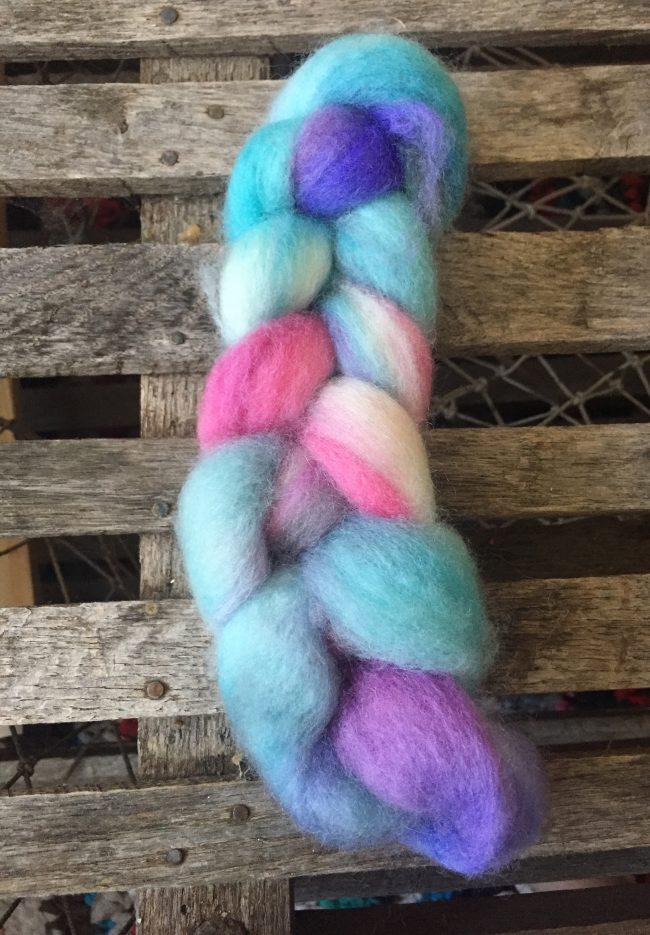
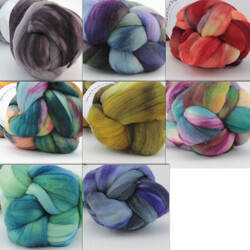
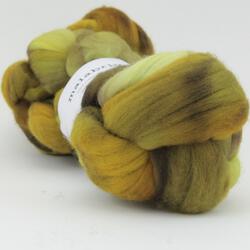
After applying the dye where I wanted it, I turned on the heat. Once it starts to steam and simmer, I keep a very close eye on things. You usually know it’s done when the water in the pot is clear. I use a plastic spoon handle to gently move some fiber away from the side of the pan to check. With turquoise, though, the water never seems to go clear (this time around, neither did the violet). But that’s ok – once it seemed like a very long time had gone by, I decided to turn the heat off and call it good. Here’s how they came out:

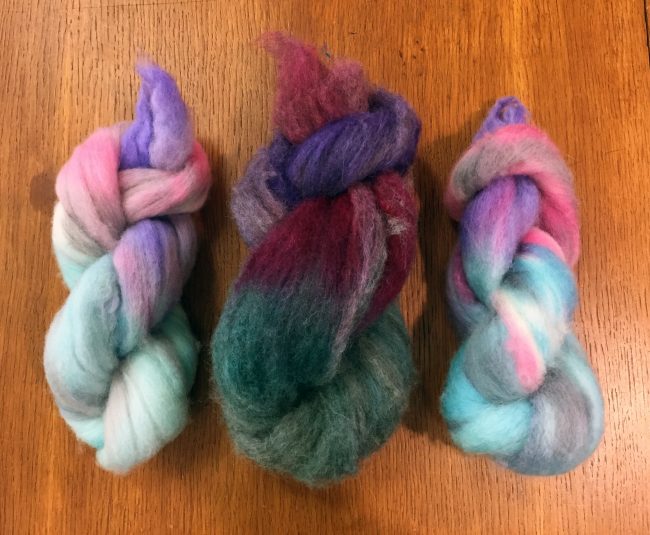
I was worried about getting the Finn confused with the BFL, but as you can see the BFL is much fuzzier; I had no trouble telling the two apart. And look at how different the gray Coopworth blend ended up! Those same bright colors you see on the white fiber turn much more somber on the darker base.

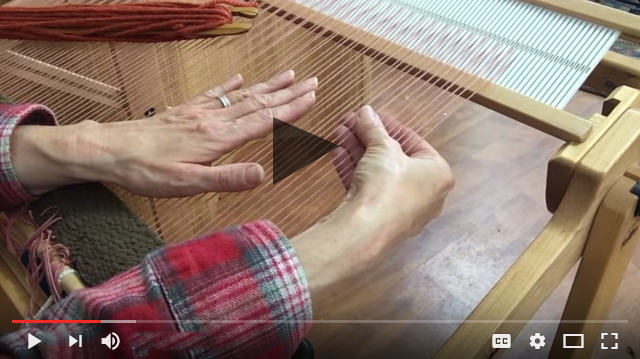
There are a lot of different ways folks will spin their hand dyed roving. Planned color changes and different plying techniques can yield hundreds of different results. There was an awesome issue of PLY Magazine a few months back that had some really interesting articles about this subject, from which I learned a great deal. As much as I like to ignore such knowledge in pursuit of crafting adventures, I decided to give one technique a try.


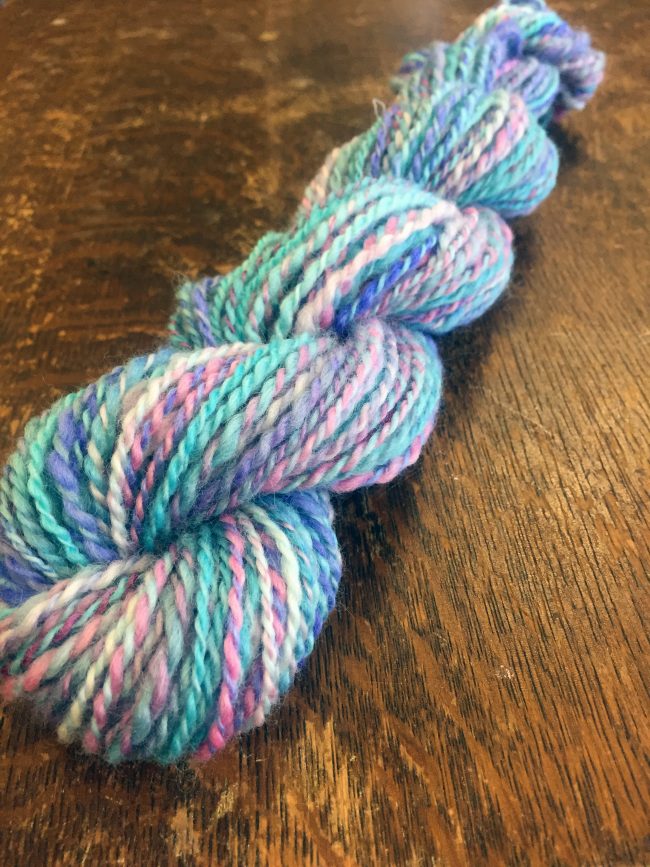
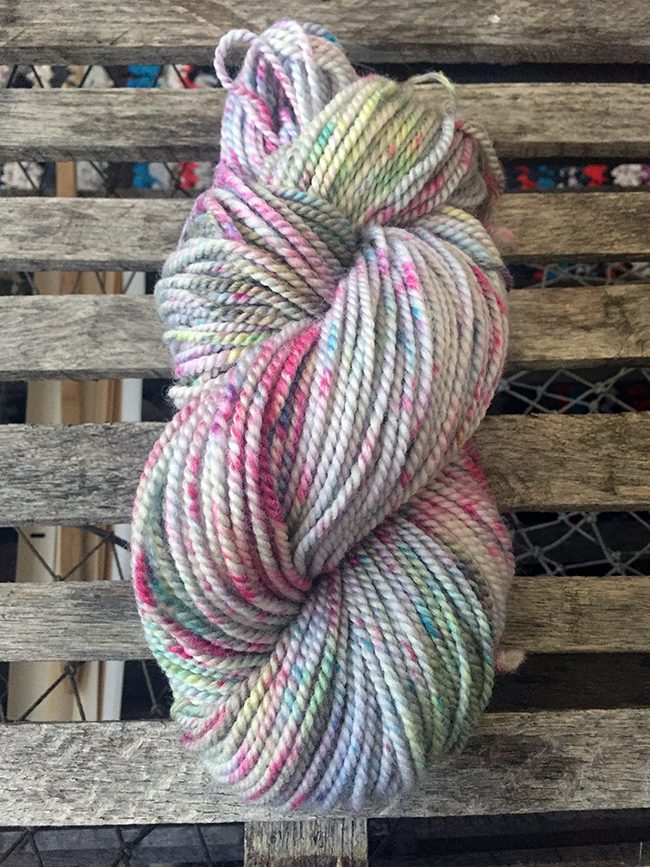
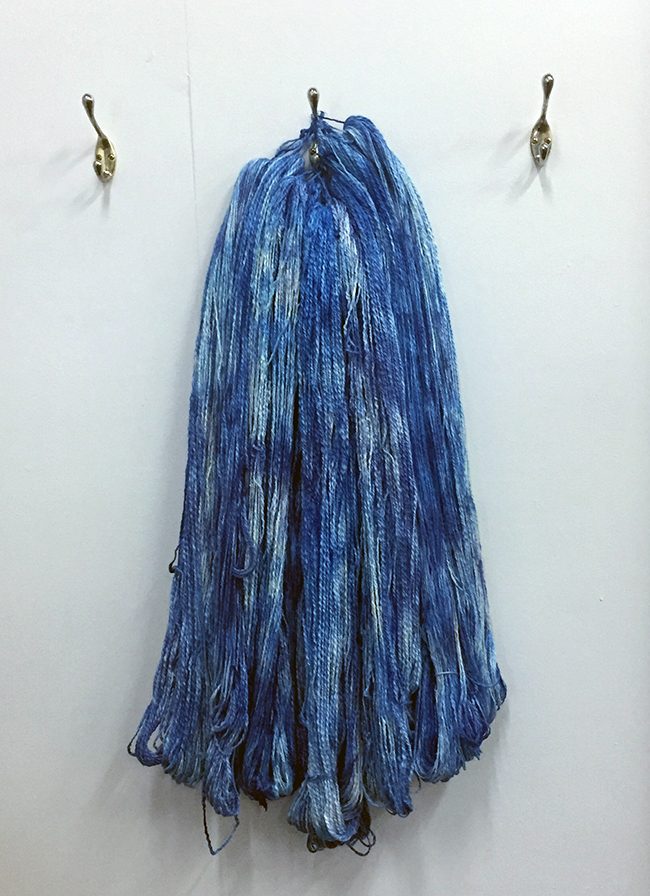
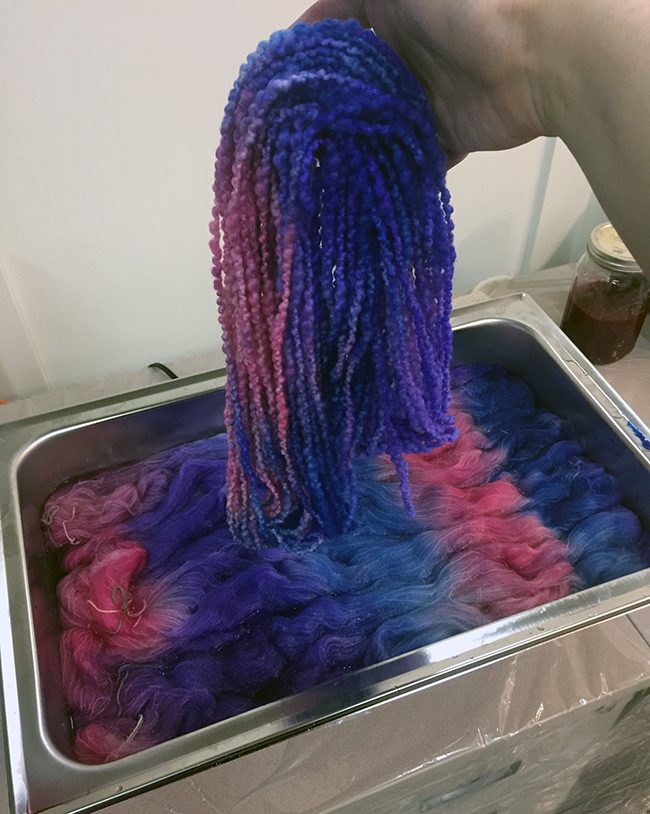
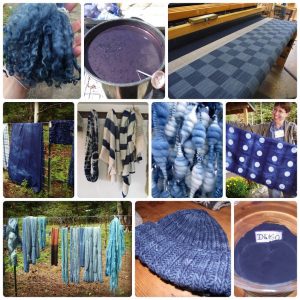
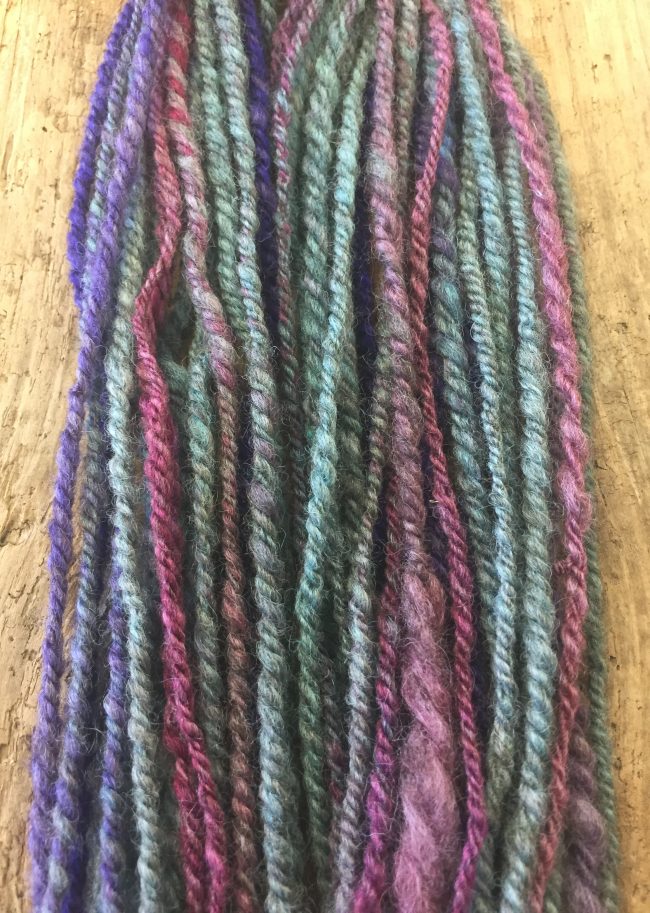
First, I took the BFL and split in half, lengthwise. I set one half aside, and split the other one in half again. I set one half of this to another side, and continued until I had a series of thick to thin lengths of roving. My plan: to spin the first half I set aside as one ply, then spinning the rest in order of thickest to thinnest for the second ply. Technically, that should mean the first ply will have longer color changes, with the color changes happening faster as the roving gets thinner. The result was much more pastel than I’d expected…

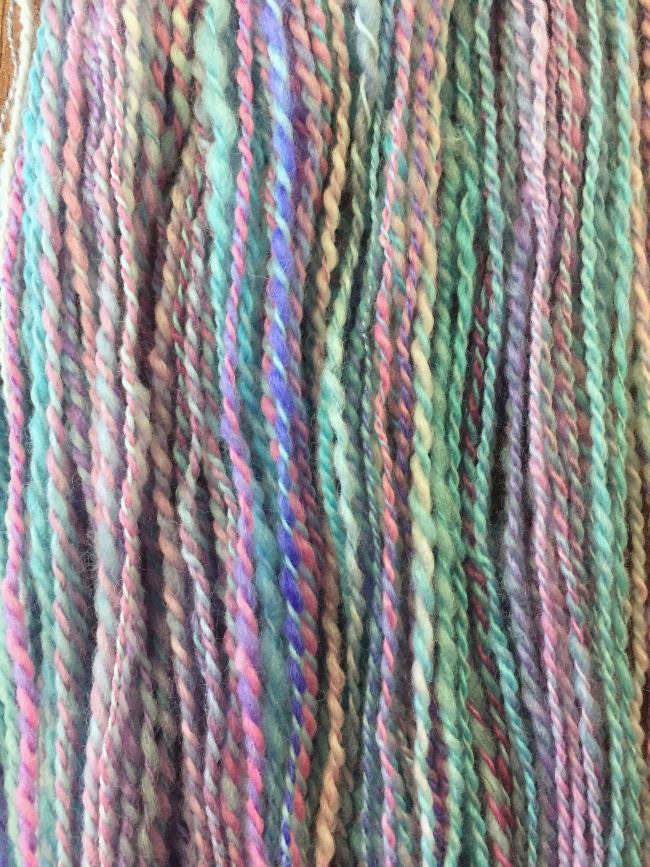
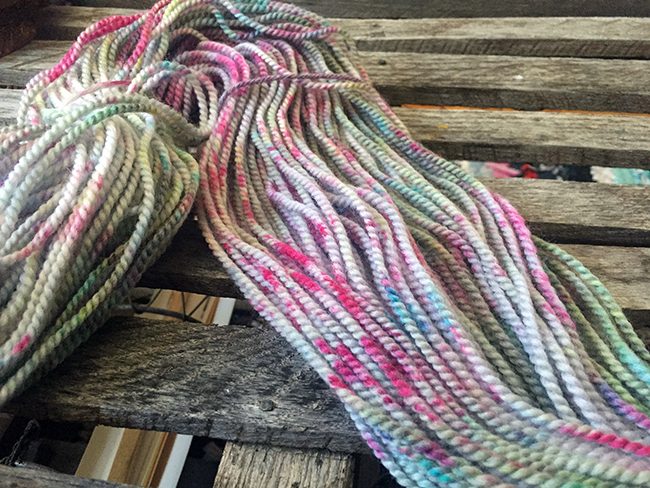
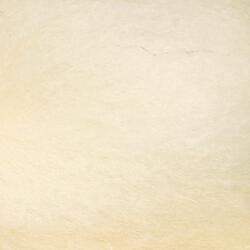
Blue Faced Leicester Wool Top Fiber is so fluffy and soft! But what about that [Sorry, item discontinued or temporarily out of stock] ? For this one, I didn’t divide the length of roving at all. Spun with the longest possible color changes, I then chain-plied this to create more of a gradual, almost gradient yarn.


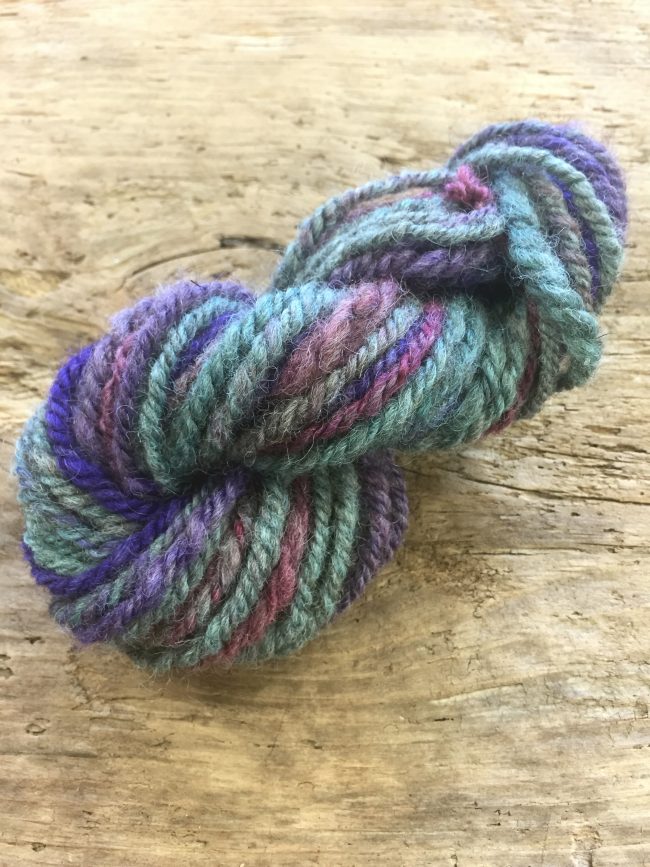
The result was a sturdy, wooly yarn with a decent amount of drape and softness. Not bad for an experiment!

If you’re interested in giving this a try yourself, you can click here to browse our fiber selection. You can also click here to see what we’ve got for dyes. If you love the stuff but can’t be bothered, check out these great fibers that have already been dyed for you:

Nube by Malabrigo Fiber is 100% Merino, kettle dyed in various colorways. I’ve spun two of these braids already myself, and they will not be the last.


[Sorry, item discontinued or temporarily out of stock] is always eye catching, and it’s very easy to spin. I can’t tell you how many people have asked if we have this as already spun yarn! (We don’t, I’m sorry to say – but I did try to approximate one of the colorways for our recent Hand-Dyed collection, which you can check out by clicking here)


[Sorry, item discontinued or temporarily out of stock] comes in slightly deeper tones, and Romney is always a joy to spin. I have a skein of single ply fingering weight spun from this at home, which I think I might someday incorporate into a warm shawl.


Whether you dyed them yourself or not, these variegated wool rovings can be used so many different ways it’s sometimes overwhelming. I guess that just means we need to spend more time playing with them!


Related items of interest: • Our yarns weight yarnsMerino yarnsOur fibersDyeing Dyes

Splatter Dye, The Sequel

I. Love. Splattered. Yarn. There, I said it. And if you caught my earlier post about trying to accomplish that elusive (to me) effect with my own hand dyeing process, you’ll be interested to learn that I think I figured it out. Using a skein of [Sorry, item discontinued or temporarily out of stock] , some Wash Fast Acid Dyes - 1 oz. 338 Magenta and Country Classic Dyes for protein fibers COC77 Mt Aqua , I managed to get a little closer to my dream yarn.


The skein I used for this project was actually a casualty from my first splatter attempt. It was meant to be bold speckles of aqua, green and yellow, but it ended up blending together and turning everything an unfortunate shade of booger. This was due to two reasons: The yarn got too wet during the heating process, and I didn’t get it hot enough for a long enough time to make the dye set. So I soaked it in vinegar and water again, squeezed out as much excess moisture as I could, and laid it out on my work surface.

You might be able to tell from the photo, but instead of mixing my dye first, this time I dipped my fork directly into the dye powder. Applying dry dye powder is awesome because it gives you those concentrated spots of color and it stays where you put it with little to no bleeding. However, it can be awful because as soon as a drop of water hits those powder spots, things can get out of hand very fast. You win some, you lose some, right?

After applying the color, you have to heat the yarn for it to set. My first attempt didn’t work because I used my clothes iron on it’s highest steam setting, hovering it over the skein and slowly moving it back and forth for about 10 minutes. Ok, maybe 5 minutes. I can laugh at this now, but anyone new to using these dyes might make the same mistake. So I’m here to tell you: To set your dye, the heating method needs to be hot, even, and somewhat longer than you want it to be (i.e., once it goes on heat and you have a snack, it probably won’t be done by the time you’re done munching).

So. This time I left the damp yarn on the baking sheet, covered it with aluminum foil, and stuck it in a 350 degree oven. I checked it frequently, as I was worried about burning the yarn. After about 30 minutes, I removed the yarn from the oven and allowed it to cool fully. Rinse, dry, and here’s what I got:

Since the skein of yarn I used for this project (Norumbega Yarn) boasts such generous yardage and is known for its sturdiness, I’m definitely going to make a pair of mittens out of it. Not until after I dye all the white yarn in my house, though!


Related items of interest: • Dyeing DyesOur yarnsMedium weight yarnsWool yarns

Summer is in full swing and there’s plenty to look forward to…

We have several great classes coming up and we hope you’ll join us. New classes for fall will be announced soon, but there’s a few right around the corner – don’t miss out!

Felted Vessels with Susan Mills

Saturday, July 22 • 10:00 am – 4:00 pm

Learn to Spin Yarn on the Drop Spindle with Lesley Fowler

Saturday, July 29 • 10:00 am – 4:00 pm

Beginning Tatting with Elaine O’Donal (two day class)

Saturday, August 12 • 10:00 am – 2:30 pm & Sunday, August 13 • 10:00 am – 12:00 pm

Introduction to Rigid Heddle with Sherry Cochran (two day class)

Saturday and Sunday, August 26 – 27 • 9:30 am – 3:30 pm

Annual Open House Sale & Celebration October 7th

Save the date… Halcyon’s Annual Open House will be on Saturday, October 7th! Every year we look forward to welcoming customers and old friends from all over the country for our biggest event of the year. With wonderful demonstrations, free refreshments, plus prizes and huge savings on everything in the store, this is a day you don’t want to miss. This year will bring some new surprises too!

SUMMER HOURS:

Monday – Friday 10:00 am to 6:00 pm

Saturday 10:00 am – 4:00 pm

Sunday 11:00 am – 4:00 pm

Have you visited before?

If you’re visiting the area, we’re happy to help you find your way around, or you can check out maps, travel resources, and local attractions at visitbath.com.

Driving Directions to Halcyon Yarn in Bath, Maine, are here: DIRECTIONS


Portrait of Gretchen
by: Gretchen

See you at NEWS!


The New England Weavers’ Seminar (NEWS) is this weekend!

Will we see you at NEWS? This weekend we’re on the beautiful campus of Smith College and we’d love for you to stop by and say hello!

This wonderful weaving conference is a biennial event, organized by the New England Weavers’ Guilds. Every other summer weavers and textile enthusiasts of all stripes (or twills) gather in beautiful Amherst, Massachusetts for a long weekend of classes, tours, exhibits, shopping, and weaving camaraderie. This year Halcyon Yarn is among the vendors offering weaving yarns, kits, books, tools and more. The event is open to the public for shopping, and viewing the world class weaving on display. Plus, there is still space in some of the drop-in classes!

If you love the fiber arts, NEWS is a gathering you won’t want to miss. Stop by the Halcyon Yarn booth for a special offer and chance to win one of our wonderful weaving kits – and to see one of Halcyon Yarn co-founder, Hector Jaeger’s, beautiful hand-dyed and handwoven wool rugs. We hope to see you there!

We’ll be sharing some highlights, and a little of what we learned, in our national weekly newsletter soon, so check your email and make sure you’re signed up for that list as well for the details of this very special gathering.

Details and the full schedule can be found on the NEWS website, or Facebook page.

Portrait of Sierra Roberts
by: Sierra Roberts

Making the Hand Dyed yarn line


This summer, Halcyon Yarn is excited to present a new line of hand-dyed yarns!

Do you often find yourself gazing adoringly at dip-dyed, tie-dyed, kettle-dyed, and hand painted yarns? Me too. Even if you don’t want to stain your hands (and countertop… and floor) making your own, we’ve got you covered. I’m excited to introduce to you a very special, very limited run of hand-dyed Halcyon Signature Victorian 2-Ply, Victorian Mohair, Silk Noil, and Organic Cotton.


Of course I can’t just show you a new product, especially one that I made myself, without telling you all about how it came to be. You see, for the past month or so I have been a mad scientist at the dyepot, trying different color combinations and techniques on different yarns. And then I’ve gone home in the evening and done that some more in my own kitchen. Needless to say, I have left a trail of colorful yarn in my wake everyplace I’ve gone.

Once I decided on the yarns and colors, we needed to figure out how to do this on a larger scale. This is about the time I started wondering if it was too late to take a trip to Uruguay, where I could take a peek at how Malabrigo does it. Seriously though, there’s a big difference between hand painting one skein of yarn as compared to ten. In the end we decided to use those simple large metal warming pans you see at catered events – a yarn buffet! Fiber artists are nothing if not resourceful. But first I started dyeing the Inca Organic Cotton Yarn, which doesn’t require any heat or pots and pans:


Here’s what those messy looking skeins turned into:

(Click here to read my post about dyeing cotton!)

When you’re dyeing one skein at a time, you can really control (not to mention just plain see) where and how the color is applied to each specific spot of yarn. It’s not quite so simple when you add more skeins – depending on what kind of vessel you’re using, some of those skeins are likely to have to sit on top of others and things are likely to get a little more crowded. The magic of kettle-dyeing is that the yarn creates a barrier for the dye, thus preventing all the colors from running together during the process. That magic is also a huge problem when you’ve got ten skeins squished together in a little pan. In order to make sure the dye covers the yarn evenly, a little extra manipulation of the skeins is necessary. Tongs and syringes, a plastic spoon, and (gloved) fingers were all put to work poking and prodding the yarn.  Check out these photos of my work in progress:

The results?  Each batch of yarn was a delightful surprise, planned as it might have been. Within a single batch, there are skeins that came out a little lighter and softer colored and skeins that have bright, saturated areas of color. Our offices were draped all over with drying skeins of yarn and it felt like such a wonderland, I snapped a few photos:

As you can see, this yarn was kettle-dyed in very small batches. Great for adding a bright accent to a piece,  I especially love pairing a bright colorway with a neutral yarn in stripes or other colorwork. These hand-dyed yarns can also be used on their own if you’re looking for an all over colorful textured effect, but keep in mind that quantities are very limited – so snag a skein of your favorite colorway before they’re all gone!


Related items of interest: • Our yarnsMedium weight yarnsCotton yarns

Weave Along with Liz Gipson, Yarnworker

Ready for Liz Gipson’s newest weave-along? Us too! This summer Liz is guiding you through the Four Looks Kitchen Towels from her awesome book, Handwoven Home.


The weave-along just launched yesterday so you can still be a part of it! To learn more and to enroll visit: Four Looks Kitchen Towels Weave-Along

Whether you’re already signed on or just hearing about it now, we can get you the materials you need. The Four Looks Kitchen Towels are perfect woven in Homestead 8/2 Cotton Yarn, and we stock over 65 colors. You’ll also need a copy of her book, Handwoven Home. We have a couple in stock now and more copies coming this week so we can mail it out to you soon if you order now!


You’ll weave these on a rigid heddle loom with a 23″ weaving width, and you’ll need a 10 dent reed, as well as a shuttle and yarn. (Need to stock up? See the recommended items below.)

The Yarnworker School

Now here’s the really important part: this free weave-along is entirely supported through Patreon contributions to The Yarnworker School. We don’t often ask you to please spend your money somewhere else, but… that’s just what we’re doing! Liz is doing a wonderful job creating an online hub for teaching, learning, and sharing all things rigid heddle. If this is a resource you’d enjoy, please consider making a small contribution. In return, you’ll receive regular updates and access to all the weaving goodness she is creating. Learn more and sign up here: patreon.com/LizGipson

We hope you’ll join Liz and the Yarnworker community for this fun summer weave-along, and stay tuned for more great projects ahead!


Recommended items for the Four Looks Kitchen Towels

Rigid Heddle Looms


Stick Shuttles (5) or a Boat Shuttle and 5 Bobbins

Tip: When using stick shuttles, we prefer to use them close to the same width (or a little on the longer side) of your weaving width so that when you pass them back and forth through your shed you’re not having to reach into the shed. Since you don’t “throw” them, the way you would a boat shuttle, this helps prevent snagging warp threads or messing with your tension as you try to push them through or grab them.


Boat shuttles don’t need to be as long, since they are designed to glide through the shed with less friction – just don’t over-stuff your bobbins. Boat shuttles, although they can cost more individually, are very versatile since you can swap out as many different bobbins as you like while using the same shuttle. Almost any boat shuttle will work in this project. However for smaller looms (like a rigid heddle), where you have a smaller shed, we especially like the


The closed bottom shuttles glide more easily, especially if you’re using a stickier yarn, but you have a little less room on the bobbin. When you’re using a fine yarn like the 8/2 cotton, you can wind a good deal of yardage onto your bobbin and still have plenty of clearance so it won’t snag your warp threads in an open bottom shuttle.


We recommend experimenting to see what feels best for you!


Mini cones are 600 yds, $6.25/each when you buy 8 or more. Pound cones are approximately 3,200 yards, $17.95/pound, sold by actual weight.

You’ll need 4 colors, with the following yardages:

  • A: 1,082
  • B: 1,488
  • C: 198
  • D: 986

Here are two combos we think will look great!


Related items of interest: • Weaving BooksOur yarnsLace weight yarnsCotton yarnsWeaving Equipment

Summer classes are filling up fast – sign up now!

(above, natural colors by Jackie Ottino Graf)

Summer has arrived, and with it plenty of inspiration! Stretch your creativity and try your hand at something new with a class at Halcyon Yarn. Our summer classes are filling up fast and we don’t want you to miss out.

Materials are generally included in all our classes, and equipment is either provided or available to rent if needed. Class sizes are limited so that every student receives plenty of personal attention. Plus, students receive great discounts on all the fiber arts goodies at the shop during and for the month after the class. Click below to see  full descriptions for each class!

Natural Dyeing with Jackie Ottino Graf

Saturday, July 8 • 9:00 am – 4:00 pm

Indigo Dyeing with Jackie Ottino Graf

Sunday, July 9 • 9:00 am – 4:00 pm

Felted Vessels with Susan Mills

Saturday, July 22 • 10:00 am – 4:00 pm

Learn to Spin Yarn on the Drop Spindle with Lesley Fowler

Saturday, July 29 • 10:00 am – 4:00 pm

Beginning Tatting with Elaine O’Donal (two day class)

Saturday, August 12 • 10:00 am – 2:30 pm & Sunday, August 13 • 10:00 am – 12:00 pm

Introduction to Rigid Heddle with Sherry Cochran (two day class)

Saturday and Sunday, August 26 – 27 • 9:30 am – 3:30 pm


Visit Halcyon Yarn at NEWS, July 13-16!

The New England Weavers Seminar (NEWS) is held every other year in western Massachusetts and we’re delighted to be a part of it again this year! Take incredible classes, shop the vendor hall, view artist submissions, and celebrate your craft with a wonderful group of weavers. Learn more about this great event for weavers of all skill levels here.


Make a class at Halcyon Yarn part of your Maine vacation (or staycation) this summer!

Register now, or give us a call or email with any questions! Halcyon Yarn is located in beautiful downtown Bath, just off of coastal Route One. We’re about 40 minutes north of Portland, about an hour south of Camden/Rockland, and approximately 2.5 hours from Boston. Directions here.

If you’re visiting the area, we’re happy to help you find your way around, or you can check out maps, travel resources, and local attractions at visitbath.com.

We look forward to seeing you this summer!


We love Liz!

This week we want to give a special shout out to Liz Gipson – aka yarnworker –  whose new book, Handwoven Home, has just arrived and is already flying off the shelf. Liz has helped so many people explore rigid heddle weaving, and she happens to be one one of our favorite weaving folks. If you don’t already know her from her website yarnworker.com, you’re in for a treat! We hope you’ll pick up Liz’s great books, and check out her blog, where exciting things are always happening for rigid heddle weavers.


Liz’s style is joyful, approachable, and totally modern. She’s truly a “yarnworker” in every way you can imagine. She’s worked with Schacht and Purl & Loop to help design some of our favorite weaving tools, including the Schacht Zoom Loom 4" x 4", and the Purl & Loop swatchmaker – which we’ll have in stock soon! With a background in wool science, as well as experience with her own Navajo-Churro sheep, Liz brings you the benefits of her amazing hands-on-know-how in all things wool, spinning, and weaving.


Through yarnworker.com Liz has offered frequent weave-alongs. Check out the video (above) of her working on the Simply Striped Rug, from Weaving Made Easy, which features our Halcyon Yarn Rug Wool. She is a wonderful teacher and we hope she’ll be able to visit us in Maine before too long – stay tuned!

Weave Along with Liz – online!


Besides keeping up her weaving, teaching, and publishing, Liz is now launching an online rigid heddle weaving school – and we can’t wait! She’s launched a Patreon campaign to fund the project and we’d love to help her reach her goal. We’re pledging our support, and if you’d enjoy weaving along with Liz we hope you will do the same by signing on here:

We’ll keep you posted as her online teaching goes live, and we hope you’re as excited as we are to see more of Liz online. Until then, happy weaving!


Related items of interest: • Weaving BooksWeaving EquipmentOur yarnsSuper Bulky weight yarnsWool yarns